A Practical Guide to 인레이 기구
This guide explains how 인레이 기구, or dental inlay instruments, support the diagnosis, preparation, placement, adjustment, and finishing of indirect restorations. It reviews the main instrument categories, material considerations, ergonomic factors, infection-control requirements, workflow selection, maintenance, and purchasing criteria. Inlay instruments are used in both clinical and laboratory environments, and their design must correspond with tooth anatomy, restorative material, adhesive protocols, and the practitioner’s operating technique.
Understanding 인레이 기구 in Contemporary Dentistry
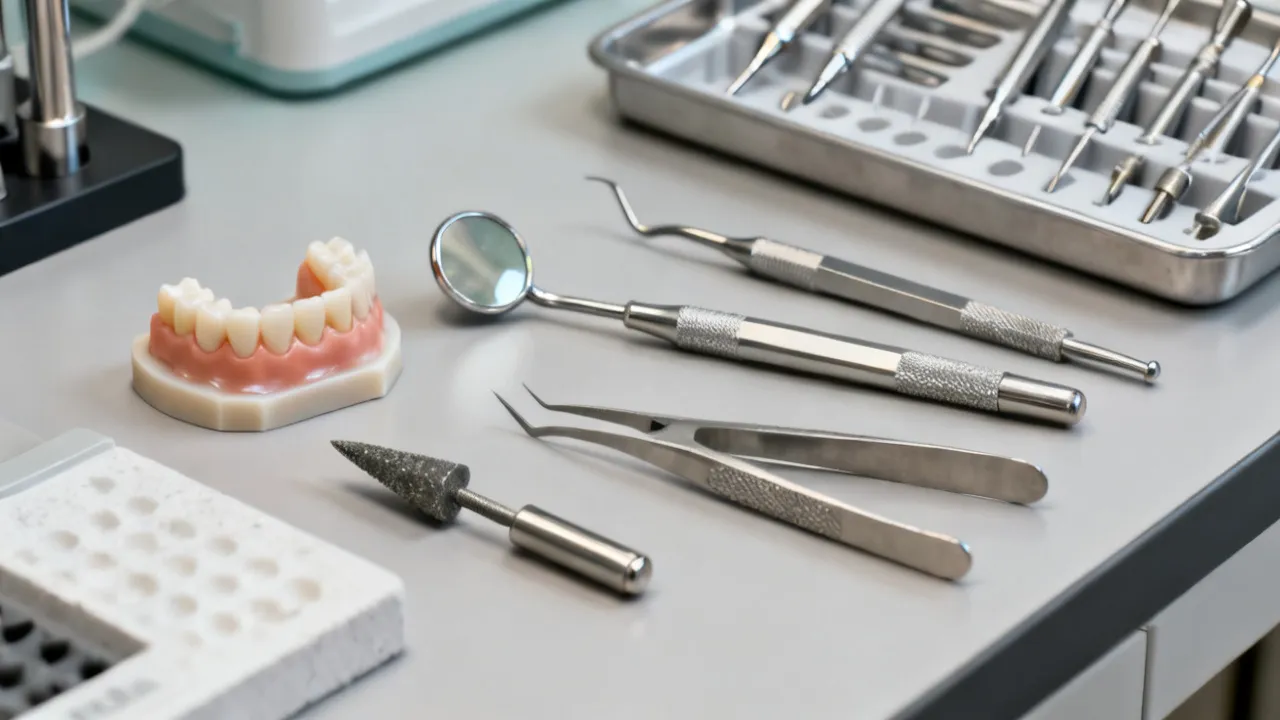
인레이 기구 refers to the instruments, rotary devices, accessories, and supporting equipment used throughout the planning, preparation, fabrication, fitting, cementation, adjustment, and finishing of dental inlays. In English, the term is commonly translated as dental inlay instruments or inlay preparation instruments. These tools may be used by dentists, dental hygienists working within their permitted scope, dental assistants, and dental laboratory professionals, although responsibilities differ according to local regulations, professional licenses, and clinical protocols.
An inlay is an indirect restoration fabricated outside the tooth and subsequently bonded or cemented into a prepared cavity. Unlike a direct filling, which is shaped inside the tooth during one clinical procedure, an inlay is designed to match a prepared internal space and is usually produced from ceramic, composite resin, gold alloy, or another approved restorative material. Inlays are generally used when a tooth requires more support, precision, or durability than may be practical with a direct restoration, but when enough cuspal structure remains to avoid the need for a larger onlay or full crown.
The quality of the final restoration depends not only on the material and laboratory process but also on the precision of the preparation and the suitability of the instruments used. A well-designed bur cannot compensate for poor isolation, and a high-quality scanner cannot produce an accurate record of an unclear margin. In the same way, excellent cementation materials may fail to perform as intended if the restoration is contaminated or if the surface-treatment protocol is not followed.
From an industry expert’s perspective, the most important principle is not to select instruments merely because they are marketed as an “inlay set.” A useful set should support the actual workflow: diagnosis, isolation, conservative preparation, impression or digital scanning, provisionalization, try-in, bonding, occlusal verification, finishing, and documentation. The correct combination varies with the restoration material, the preparation design, the practitioner’s technique, and the equipment available in the operatory.
Instrument selection also has a direct relationship with patient safety. A sharp, well-maintained cutting instrument can help the operator work with controlled pressure, while a damaged or inappropriate instrument may produce heat, vibration, poor visibility, or unnecessary removal of sound tooth structure. For that reason, purchasing decisions should consider geometry, handling, sterilization compatibility, replacement availability, and quality-control procedures rather than appearance alone.
What an Inlay Procedure Requires
Before examining individual 인레이 기구, it is useful to understand the stages in which they are used. A conventional inlay workflow may include:
- Clinical examination and diagnosis.
- Radiographic or other appropriate diagnostic assessment.
- Evaluation of occlusion, proximal contacts, periodontal condition, and remaining tooth structure.
- Review of the patient’s medical history, medications, allergies, and previous restorative experience.
- Isolation of the treatment field.
- Removal of caries, defective restorative material, or unsupported structure.
- Preparation of the cavity according to the selected restorative material.
- Recording the preparation through an impression or intraoral scan.
- Placement of a provisional restoration when required.
- Laboratory fabrication or in-office milling.
- Try-in and evaluation of fit, margins, contacts, shade, and occlusion.
- Surface treatment and adhesive or cementation procedures appropriate to the material.
- Final finishing, polishing, and clinical review.
- Patient instructions, recall planning, and documentation of the completed restoration.
Each stage places different demands on the instrument. Preparation requires cutting and finishing devices with predictable geometry. Try-in requires non-damaging handling instruments and adequate lighting. Cementation requires isolation and controlled mixing or dispensing equipment. Final adjustment requires burs, abrasive systems, articulating materials, and polishing tools that are compatible with the inlay substrate.
The same instrument may not be suitable for every stage. For example, a preparation bur designed for enamel and dentin should not automatically be used for final ceramic adjustment. Similarly, an instrument used to manipulate a restoration during try-in should have a design that minimizes contamination and accidental dropping. A well-planned setup therefore uses specialized tools where they improve control and protects the restoration from avoidable damage.
Core Categories of 인레이 기구
1. Diagnostic and Assessment Instruments
Although diagnosis is not always associated with inlay instruments, it establishes whether an indirect restoration is appropriate. A basic diagnostic arrangement commonly includes a mouth mirror, explorer or periodontal probe, cotton pliers, suction support, and illumination. Depending on the clinical situation, radiographic imaging, pulp testing, transillumination, and photographic documentation may also be used.
A mouth mirror provides indirect vision, retraction, and illumination support. The explorer or probe can assist with identifying anatomy, margins, surface irregularities, and proximal conditions, but it should not be used with excessive force. Cotton pliers or college tweezers are useful for transferring small items and handling materials under controlled conditions.
For inlay cases, visibility is especially important because the preparation must be evaluated in three dimensions. Magnification systems, headlights, and high-quality operating lights are not technically individual 인레이 기구, but they strongly influence instrument performance. When the operator can clearly see the internal line angles, cavosurface margins, and remaining tooth structure, the selected handpiece and bur can be used more conservatively.
Diagnostic instruments should also support a complete assessment of functional risk. A tooth with heavy occlusal loading, bruxism, a crack extending beyond the planned preparation, or insufficient residual structure may require a different restorative design. The instrument tray should therefore be selected after the diagnosis and treatment plan, not before them.
2. Hand Cutting and Excavation Instruments
Hand excavators may be used to remove softened carious dentin, loose restorative material, or unsupported tissue after the initial assessment. Their role is controlled removal rather than aggressive enlargement of the cavity. The instrument should feel stable in the hand, with a handle that allows appropriate finger support and tactile feedback.
Enamel hatchets, hoes, and other hand instruments may be used in selected preparation techniques, although their application depends on the practitioner’s training and the restorative material. These instruments require a secure fulcrum and careful orientation. Excessive force can chip enamel margins or create preparation features that are not required by the chosen inlay design.
Hand instruments are valuable because they provide tactile information that rotary instruments cannot always deliver. They can help the operator distinguish between firm and softened tissue, identify unsupported enamel, and refine specific areas without continuous rotary cutting. Their effectiveness depends on sharpness, correct angulation, and a clear understanding of tooth anatomy.
Instrument handles should be examined for comfort and secure grip. Smooth handles may be easy to wipe but can become slippery with gloves, water, or lubricants. Textured handles can improve control but must be compatible with the practice’s cleaning process. Balance is also important because a well-balanced instrument reduces the need for excessive finger pressure during delicate excavation and margin refinement.
3. Rotary Preparation Burs
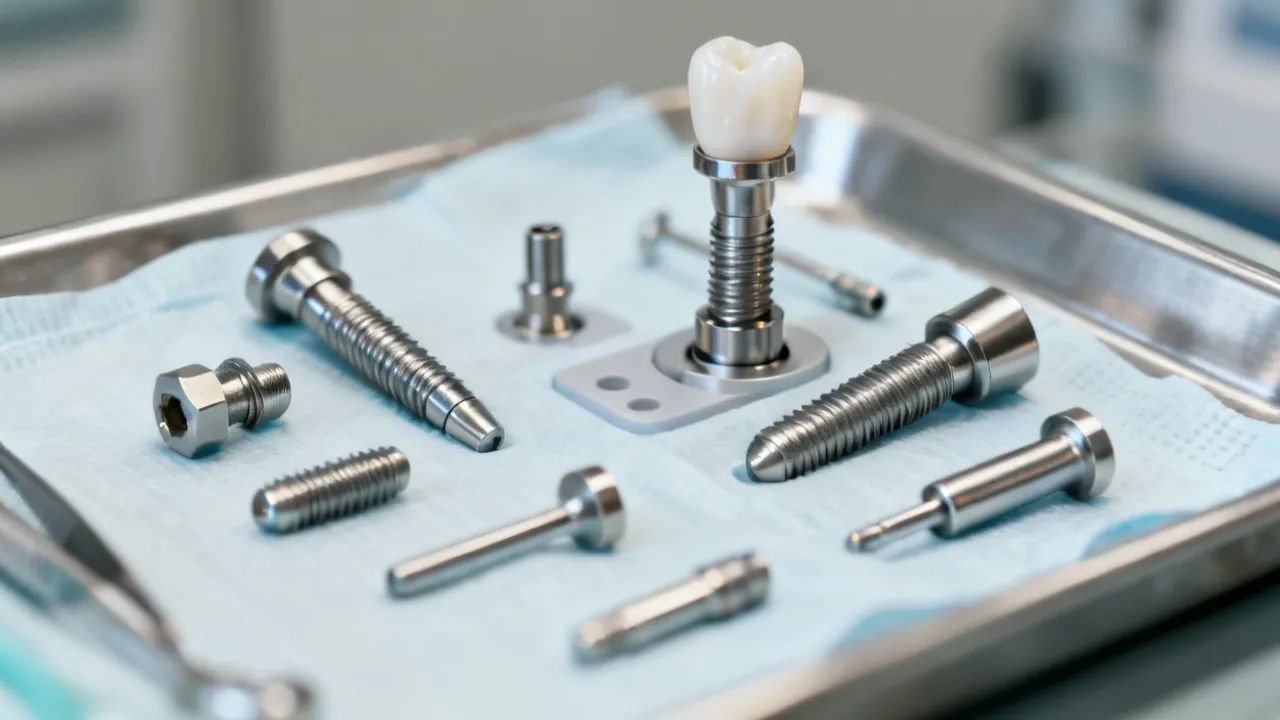
Rotary burs are among the most important components of an 인레이 기구 system. They may be made from carbide, diamond, or other cutting materials, and they are available in multiple shapes and grits. Common forms include round, pear, fissure, football, wheel, and tapered designs. Each shape influences access, wall form, internal transitions, and finishing behavior.
Carbide burs are often selected for efficient cutting of tooth structure or restorative materials. Diamond burs are available in different particle sizes and may be used for preparation, refinement, finishing, or adjustment. The correct choice depends on the handpiece, speed, coolant, material being cut, and the practitioner’s technique.
Preparation burs should be chosen based on the intended geometry rather than on size alone. A tapered instrument may assist with controlled wall form, while a round bur can support excavation or internal refinement. A fine-grit diamond may be appropriate for margin finishing, whereas a coarse instrument may remove material more rapidly but require careful control to avoid over-preparation.
Manufacturers may identify burs by color bands, numerical systems, or product families. Because coding conventions can vary, staff should consult the manufacturer’s instructions rather than assuming that color has the same meaning across brands. A written inventory system can reduce confusion and help the practice track replacement intervals.
Water cooling is often important when rotary instruments are used for extended periods or at higher speeds. Cooling helps manage heat and can improve visibility by washing away debris. The amount and delivery of coolant should be suitable for the handpiece and the procedure. Inadequate water flow may indicate a blocked port, an empty reservoir, poor maintenance, or an incorrectly positioned nozzle.
The bur must also fit the handpiece securely. A bent shank, worn chuck, or improperly seated bur can create eccentric movement, vibration, and unpredictable cutting. Before each procedure, the team should confirm that the instrument is fully seated and that the handpiece operates smoothly.
4. Finishing and Margin Refinement Instruments
The finishing stage is critical because the quality of the preparation margin affects scanning, impression accuracy, restoration fit, bonding, and long-term maintenance. Finishing instruments should create a smooth, clearly visible margin without removing unnecessary tooth structure.
Fine and extra-fine diamond burs, finishing strips, polishing discs, and selected hand instruments may be used according to the location and access of the preparation. Proximal areas require particular care. Abrasive strips can help refine or separate contact areas, but their use must be controlled to prevent unintended damage to adjacent teeth or excessive widening of the preparation.
Margin refinement should not be regarded as a cosmetic step. Irregularities, unsupported enamel, debris, or unclear finish lines can complicate laboratory communication and increase the likelihood of adjustment during insertion. An expert workflow treats finishing as a precision stage supported by magnification, adequate illumination, water cooling where appropriate, and frequent inspection.
Finishing instruments are also useful for removing small areas of unsupported enamel and smoothing transitions created during initial preparation. The goal is not to produce a preparation that is unnecessarily large or mechanically uniform in every case. Rather, the preparation should be clear, accessible, cleanable, and compatible with the design requirements of the selected restorative material.
5. Isolation and Moisture-Control Equipment
Moisture control is central to many inlay procedures, particularly when adhesive bonding is planned. The supporting equipment may include a rubber dam, clamp system, frame, saliva ejector, high-volume evacuation, cotton rolls, absorbent materials, retraction devices, and air-water syringe tips.
Isolation tools are not cutting instruments, but they are essential components of the broader 인레이 기구 setup. Contamination by saliva, blood, crevicular fluid, or debris can compromise visibility and interfere with material handling. The precise requirements depend on the cementation system, restorative material, tooth position, patient factors, and clinical protocol.
Rubber dam systems can provide a controlled field and help protect the patient from small instruments or restorative fragments. Retraction cords, paste systems, and specialized isolation aids may be selected when subgingival or difficult-to-access margins are present. Their use should be consistent with periodontal health and the clinician’s training.
High-volume evacuation is particularly valuable during rotary preparation because it helps remove spray, particulate material, and excess coolant. The assistant should position the evacuator without obstructing the clinician’s view or interfering with the handpiece. Efficient four-handed dentistry can make isolation more stable and reduce interruptions during critical preparation and bonding steps.
6. Impression and Digital Workflow Instruments
Traditional inlay workflows may use impression trays, elastomeric impression materials, mixing instruments, syringes, retraction materials, and bite-registration products. The tray must be rigid enough for the chosen impression system and properly sized for the patient. Material handling devices should be clean, compatible, and organized before the procedure begins.
Retraction is often important when the finish line approaches the gingival margin. Retraction cords, cord-packing instruments, hemostatic agents, or alternative retraction materials may be selected according to tissue condition and the clinician’s protocol. Excessive force or prolonged tissue compression should be avoided because it may cause discomfort or bleeding that makes the impression more difficult.
Digital workflows use an intraoral scanner, scanning tips, software, and a digital communication system. The scanner itself is not a preparation instrument, but it changes the surrounding setup. The operator must ensure that the preparation is dry enough for reliable imaging, the finish line is visible, and the scan captures the relevant occlusal and proximal information.
Whether the record is conventional or digital, the clinical requirement remains the same: the laboratory needs a clear and accurate representation of the preparation and its surrounding structures. No instrument can compensate for an unclear margin, inadequate retraction, incomplete scan, or unstable impression.
Digital scanning also requires attention to software verification. The operator should inspect the scan for holes, stitching errors, excessive saliva artifacts, and missing distal or lingual surfaces. A visually attractive scan may still be incomplete in an area that is important for fit. Review should occur before the patient leaves whenever possible.
7. Provisionalization Instruments
When an inlay cannot be delivered during the same appointment, a provisional restoration may be required. Instruments and supplies can include a temporary restoration material, dispensing gun, spatula, matrix, trimming burs, finishing discs, occlusal marking materials, and a temporary cementation system.
The provisional restoration should protect the prepared tooth, preserve function as appropriate, reduce sensitivity risk, and maintain practical contact relationships. It should not create an occlusal interference or injure the gingival tissues. The operator should inspect margins and contacts before the patient leaves, using suitable instruments for trimming and verification.
Temporary cement should be selected with consideration for the planned final adhesive protocol. Some temporary materials or cement residues may interfere with later bonding if they are not thoroughly removed. The clinical team should document the provisional material used and follow the final cement manufacturer’s recommendations for cleaning and preparation.
8. Try-In and Placement Instruments
Try-in commonly requires cotton pliers, restoration forceps, a probe, articulating paper holders, floss, mixing pads, applicators, and suitable microbrushes. The restoration should be handled carefully to avoid contamination, chipping, or accidental displacement.
A restoration may be evaluated for seating, marginal adaptation, proximal contact, shade, contour, and occlusion. The sequence of evaluation can vary, but many clinicians first confirm that the restoration seats properly before making extensive occlusal judgments. If the inlay does not seat, the cause must be investigated rather than forcing it into place.
Restoration forceps should provide a secure but gentle grip. Excessive squeezing may damage fragile ceramic edges, while an inadequate grip may result in accidental dropping. Some clinicians use specialized try-in sticks or temporary handling aids, but these should not leave residues that compromise bonding.
Adhesive procedures may require etching instruments, applicators, air dispersion, curing lights, mixing wells, and cement delivery systems. Compatibility between the restoration material, surface-treatment protocol, adhesive, and luting cement is essential. The practitioner should follow the instructions for use supplied with each product and consider the recommendations of the restoration manufacturer.
9. Adjustment and Polishing Instruments
After placement, minor occlusal adjustment may be necessary. Articulating paper or another approved marking medium can help identify contacts, but marks should be interpreted alongside the patient’s occlusion and the clinician’s examination. A mark alone does not determine whether a contact is clinically excessive.
Adjustment instruments must match the restoration material. Ceramic, composite, and metal inlays respond differently to rotary instruments and polishing systems. Using an unsuitable bur may create roughness, heat, microfractures, or an altered surface texture. The finishing sequence should therefore follow material-specific guidance.
Polishing is more than creating a smooth appearance. A well-finished surface can support patient comfort and facilitate plaque control, while an excessively rough surface may be undesirable around the restoration. The exact polishing protocol should be selected for the material and applied with controlled pressure, appropriate speed, and adequate cooling when indicated.
The clinician should avoid unnecessary reshaping of functional anatomy. An inlay is intended to restore form and function, not simply to eliminate every articulating mark. Occlusal adjustment should be conservative, systematic, and confirmed in both static and dynamic movements when clinically appropriate.
How Instrument Design Affects Clinical Control
Instrument design influences precision through several factors: handle diameter, surface texture, weight distribution, shank length, working-end geometry, balance, and visibility. A handle that is too narrow may encourage excessive gripping force. A handle that is too large may reduce delicate tactile control. Textured surfaces can improve handling, but they may also make cleaning more demanding if the design contains deep grooves.
Rotary instruments are affected by concentricity, blade or diamond distribution, shank fit, and compatibility with the handpiece. A bur that does not seat securely may produce vibration or runout. The dental team should inspect rotary instruments before use and remove those with visible damage, corrosion, distortion, or compromised cutting performance.
The working end should be appropriate for the access and the desired preparation. A long instrument may improve reach in some areas but can reduce stability if the operator lacks adequate support. Shorter instruments may provide better control in limited access. There is no universal design that suits every tooth, preparation depth, or operator.
Ergonomics should also be considered at the level of the complete tray. Instruments that are arranged in the order of use reduce unnecessary searching and hand movement. Assistants can improve efficiency by preparing separate groups for diagnosis, preparation, impression or scanning, provisionalization, and cementation. This organization also supports counting procedures and reduces the likelihood that a contaminated instrument will be returned to the wrong area.
The visual contrast between a bur and the operating field can affect accuracy. Dark or stained instruments may make small debris and margin irregularities harder to see. Clean, well-maintained instruments and properly positioned lighting help the operator distinguish the preparation from surrounding tooth structure.
Choosing the Right 인레이 기구 Set
A dental practice evaluating an 인레이 기구 set should begin with a workflow assessment. The following questions are practical:
- Are inlays prepared and inserted in one appointment or across multiple visits?
- Are ceramic, composite, metal, or several materials used?
- Does the practice rely on conventional impressions, digital scans, or both?
- Which handpieces and speed-control systems are available?
- Is rubber dam isolation routine, selective, or procedure-dependent?
- Are polishing and adjustment performed in the clinic or by an outside laboratory?
- Can replacement burs, tips, and compatible components be obtained consistently?
- Does the instrument design support the cleaning and sterilization process used by the practice?
- Can assistants identify the instruments quickly during a busy clinical schedule?
- Does the practice have an established method for tracking wear and replacement?
Once these questions are answered, the practice can separate essential instruments from optional accessories. A compact set may be sufficient for a clinic that performs limited inlay procedures and sends complex cases to a laboratory. A broader system may be appropriate for a practice with frequent indirect restorations, same-day milling, or multiple clinicians with different preparation preferences.
Quality should be evaluated through objective features. Look for clear product specifications, material information, handpiece compatibility, sterilization instructions, and a defined replacement policy. Supplier communication is also important. A vendor should be able to explain whether individual burs or components can be reordered, how products are packaged, and what documentation accompanies the instruments.
Cost should be considered over the instrument’s useful service life rather than by initial purchase price alone. A low-cost item that dulls rapidly, fits poorly, or cannot be replaced may create higher operational costs. Conversely, a premium instrument is not automatically appropriate if its geometry does not match the practice’s technique. The best purchasing decision balances performance, durability, maintenance, availability, and clinical suitability.
Standardization can be beneficial when several clinicians share the same operatory. A common tray layout reduces setup time and makes it easier for assistants to anticipate needs. However, standardization should not prevent clinicians from using specialized instruments when anatomy, material, or clinical circumstances require an alternative approach.
Comparison of Major Instrument Categories
| Instrument category | Primary purpose | Key selection considerations | Common operational risk |
|---|---|---|---|
| Diagnostic instruments | Examination, visibility, and assessment of tooth structure | Mirror clarity, probe design, handle comfort, and compatibility with the examination protocol | Misinterpretation caused by poor lighting, contamination, or excessive probing force |
| Hand excavators | Controlled removal of softened tissue or loose material | Sharpness, working-end size, tactile feedback, and access | Excessive force or use in an unsuitable area |
| Carbide burs | Efficient cutting of tooth structure or selected restorative materials | Shape, blade design, shank compatibility, cooling, and speed | Vibration, heat, or over-preparation from worn or inappropriate burs |
| Diamond burs | Preparation, refinement, finishing, and material adjustment | Grit, shape, particle distribution, and intended substrate | Surface damage or reduced control when pressure and speed are excessive |
| Isolation equipment | Moisture control, visibility, and patient protection | Fit, retraction capacity, suction performance, and protocol compatibility | Contamination or soft-tissue irritation |
| Impression or scanning equipment | Recording the preparation and surrounding anatomy | Accuracy, access, software or material compatibility, and operator training | Incomplete margin capture or distortion |
| Try-in instruments | Positioning and evaluation of the indirect restoration | Grip, cleanliness, visibility, and protection against accidental dropping | Contamination, forced seating, or inaccurate evaluation |
| Adjustment and polishing tools | Occlusal refinement and surface finishing | Compatibility with ceramic, composite, or metal and the recommended sequence | Roughness, heat, chipping, or altered occlusal anatomy |
Step-by-Step Instrument Setup
A carefully prepared setup can improve consistency without making the procedure unnecessarily complex. The following sequence is a general organizational guide, not a substitute for clinical training or product instructions.
Step 1: Confirm the Case and Material
Review the planned restoration, tooth, preparation design, restorative material, and cementation approach. The selected instruments should be available before isolation begins. If the case includes a ceramic inlay, confirm that the adjustment and polishing system is intended for that ceramic category. If a digital record is planned, confirm scanner readiness and the condition of the scanning tip.
Step 2: Inspect the Instruments
Check mirrors for damage, hand instruments for sharpness and alignment, burs for wear and corrosion, and rotary shanks for secure fit. Any instrument with visible defects should be removed from the clinical tray. Inspection is particularly important for instruments that have undergone repeated sterilization cycles.
Step 3: Arrange Instruments by Sequence
Place diagnostic instruments first, followed by isolation aids, preparation burs, finishing instruments, impression or scanning supplies, provisional materials, and cementation tools. This order helps the assistant anticipate the next stage and reduces unnecessary movement across the treatment field.
Step 4: Establish Isolation and Visibility
Apply the selected isolation method and verify that the tooth, margins, and adjacent structures remain visible. Adjust lighting, magnification, suction, and retraction before beginning preparation. A stable field improves the operator’s ability to use the 인레이 기구 with controlled pressure.
Step 5: Prepare Conservatively
Use the appropriate bur or hand instrument for each stage. Maintain a stable finger rest and use intermittent inspection to confirm the developing preparation. The objective is to remove compromised structure while preserving sound tissue and producing a design compatible with the restoration material.
Step 6: Refine and Verify the Preparation
Inspect internal transitions, margins, proximal access, undercuts, debris, and unsupported enamel. The restoration should be able to seat according to the selected path of insertion. If the preparation is unclear, refine it under magnification rather than relying on aggressive cementation or excessive adjustment later.
Step 7: Record the Preparation
For a conventional impression, manage retraction and material handling according to the system’s instructions. For a digital scan, capture the preparation, adjacent teeth, opposing arch, and occlusal relationship as required. Review the record before dismissing the patient or proceeding to fabrication.
Step 8: Protect the Prepared Tooth
If a provisional restoration is needed, trim and polish it carefully. Verify that the provisional does not create obvious contact or tissue problems. The provisionalization instruments should then be separated from clean cementation instruments to avoid cross-contamination.
Step 9: Evaluate the Inlay at Try-In
Clean the restoration and use suitable handling instruments. Confirm seating, margins, contacts, contour, and occlusion in a logical order. Avoid forcing the restoration into position. If resistance is encountered, examine the preparation, proximal contact, internal surface, and possible debris.
Step 10: Complete Cementation and Finishing
Use the adhesive and cementation instruments designated for the selected material and protocol. Remove excess material according to the product instructions, protect soft tissues, and complete the final occlusal and surface evaluation. Adjustment should be conservative, followed by material-specific polishing.
Step 11: Complete the Postoperative Review
After finishing, inspect the margins and proximal contacts, remove residual cement, and confirm that floss passes appropriately where indicated. Review the patient’s comfort, occlusion, and ability to close and move the jaw normally. The patient should receive instructions about sensitivity, chewing, oral hygiene, and circumstances that warrant contacting the practice.
Cleaning, Disinfection, and Sterilization Considerations
Instrument reprocessing is a central part of managing 인레이 기구. The exact method depends on the instrument classification, manufacturer’s instructions, national regulations, and the practice’s infection-prevention program. Reusable instruments should be handled as contaminated after use and transported in a manner that reduces injury and environmental exposure.
Visible debris should not be allowed to dry on instruments. Presoaking, automated cleaning, ultrasonic cleaning, or manual cleaning may be used where appropriate, but staff should follow the instrument and equipment manufacturer’s instructions. Manual cleaning creates a sharps risk and should be performed with suitable protective equipment and procedures.
After cleaning, instruments should be inspected for residual debris, corrosion, damage, and function. Hinged instruments may require appropriate maintenance products if permitted by the manufacturer. Rotary burs need particular attention because debris can remain within cutting surfaces or diamond particles.
Packaging and sterilization parameters must be compatible with the instrument. Not every component of an inlay system can be processed in the same way. Some accessories may be single-use, while others are designed for repeated sterilization. Reuse should never be assumed solely because an item appears intact.
Documentation can support quality assurance. A practice may record sterilization cycles, instrument packs, maintenance activities, and damaged-item removal according to its internal policy. These records are useful when investigating equipment problems, training staff, or reviewing the consistency of reprocessing.
Storage after sterilization is also relevant. Packs should remain intact, dry, and protected from excessive handling. Instruments should be arranged so that staff can identify them without opening multiple packs unnecessarily. If packaging is wet, torn, or compromised, it should be managed according to the practice’s reprocessing policy rather than used automatically.
Maintenance and Replacement of Rotary Instruments
Rotary instruments do not remain clinically identical throughout their service life. Cutting efficiency may decrease, diamond particles may become worn, and shanks may be damaged by improper handling. A worn bur can increase procedure time and may encourage the operator to apply more pressure, potentially affecting heat generation and preparation control.
Replacement should be based on condition, manufacturer guidance, procedure type, and the practice’s quality policy. A bur used for extensive restorative material removal may require replacement earlier than one used for a limited finishing step. The practice should avoid using an instrument beyond its safe or effective condition merely because it remains visibly complete.
Storage also influences performance. Burs should be protected from impact, organized by type, and kept in a manner that allows inspection. Throwing unprotected burs into a drawer can damage cutting surfaces and increase the chance of accidental injury. A labeled bur block or covered organizer may improve both safety and efficiency.
Handpieces should be maintained according to their manufacturer’s recommendations. Poorly maintained bearings, inadequate lubrication, or an unstable chuck can affect the performance of an otherwise suitable 인레이 기구. The instrument and the handpiece should therefore be evaluated as a combined system.
Practices may benefit from categorizing burs as new, active, limited-use, or retired. Such a system does not replace inspection, but it helps staff recognize when an instrument has already been used for demanding procedures. It can also reduce the temptation to return a questionable bur to general stock.
Common Errors in Inlay Instrument Use
Using One Bur for Every Stage
A single bur may appear convenient, but preparation, finishing, ceramic adjustment, and polishing have different requirements. A general-purpose instrument may not provide the control or surface quality required for each stage. A planned sequence is usually more predictable.
Ignoring Material Compatibility
Ceramic, composite, and metal restorations should not be adjusted using an arbitrary abrasive. The wrong tool can create roughness or damage that is difficult to correct. Always confirm the recommended bur and polishing sequence for the material being treated.
Applying Excessive Pressure
Pressure can reduce tactile feedback and increase heat or vibration. Controlled, intermittent contact with suitable cooling is generally more appropriate than forcing a dull or unsuitable instrument through the tooth or restoration.
Failing to Inspect the Margin
A margin that appears acceptable from one angle may be unclear from another. Magnification, illumination, air drying where appropriate, and systematic inspection help reveal unsupported enamel, debris, irregularities, or an unsuitable path of insertion.
Forcing an Inlay That Does Not Seat
When an inlay does not seat, forcing it can damage the restoration or tooth. Possible causes include proximal contact, internal interference, debris, distortion in the record, or an inaccurate restoration. The issue should be evaluated methodically before any irreversible adjustment.
Underestimating Isolation
Good preparation instruments cannot compensate for a contaminated bonding field. The selected isolation system should be practical for the tooth, patient, margin location, and adhesive protocol. If moisture control is difficult, the clinician should reassess the technique and case conditions before proceeding.
Overlooking Staff Training
A set is only as effective as the team’s understanding of its use. Assistants should know the names, sequence, handling requirements, and reprocessing limitations of the instruments. Regular review can reduce setup errors and improve communication between the dentist and support staff.
Using Excessive Occlusal Adjustment
Removing too much restorative material during adjustment can weaken anatomy and create an uneven functional result. Articulating marks should be interpreted in context, and the clinician should adjust only the areas necessary to achieve a stable and comfortable occlusion.
Safety and Patient-Centered Use
Instrument safety includes more than preventing accidental puncture. The operator should consider heat, vibration, aerosol generation, debris control, soft-tissue protection, and the patient’s ability to remain comfortable and still. High-volume evacuation and appropriate personal protective equipment should be used according to the practice’s infection-control procedures.
Small instruments and restorative fragments should be managed carefully. During try-in and adjustment, the patient should be positioned appropriately, and the team should use methods that reduce the risk of swallowing or aspirating components. Rubber dam isolation may provide additional protection in suitable cases, but it should be applied correctly and monitored throughout the procedure.
Patients may experience sensitivity, fatigue, or anxiety during an indirect restoration appointment. Clear explanations, adequate breaks where appropriate, and efficient instrument preparation can improve the treatment experience. A well-organized tray is not only a productivity measure; it can help the clinical team maintain a calm, predictable sequence.
Noise and vibration from the handpiece can be particularly uncomfortable for some patients. A stable instrument, adequate coolant, and appropriate speed can reduce unnecessary vibration. The clinician should communicate with the patient during longer preparation stages and respond promptly if discomfort or sensitivity occurs.
Clinical Documentation and Laboratory Communication
Inlay outcomes depend on communication between the clinic and laboratory when fabrication is outsourced. The prescription should clearly state the tooth, restoration type, material, shade information where relevant, preparation considerations, occlusal requirements, and any specific instructions. Photographs, scans, and drawings may supplement written communication.
The laboratory should receive a record that represents the preparation accurately. If the finish line is difficult to identify, the clinician should provide additional information rather than expecting the technician to infer the intended design. The laboratory may also communicate concerns about preparation geometry, available material thickness, or the path of insertion.
Documentation of the instruments used is not normally a substitute for clinical judgment, but it can assist in quality review. A practice may track the preparation system, restorative material, cementation product, curing-light verification, and adjustment protocol. This information can be valuable when evaluating sensitivity, debonding, fracture, or repeated adjustment concerns.
Digital cases should include clear naming conventions and verification of the correct patient, tooth, and arch. A technically accurate scan sent with incorrect case information can create serious workflow problems. Staff should verify the prescription, scan files, photographs, and laboratory instructions before transmission.
Economic and Procurement Considerations
When purchasing 인레이 기구, clinics should compare total value rather than focusing only on the listed price. Relevant factors include initial cost, replacement frequency, sterilization requirements, expected durability, supplier reliability, warranty terms, delivery consistency, and compatibility with existing equipment.
Purchasing a large number of instruments at once may simplify standardization, but it can also create unnecessary inventory if the set includes items that are rarely used. A staged purchasing approach may be more practical: establish a core set, review actual usage, and add specialized instruments when a recurring clinical need is identified.
Supplier evaluation should include product documentation and technical support. The vendor should identify the instrument material, intended use, handpiece compatibility, reprocessing instructions, and limitations. If information is unclear, the practice should request clarification before placing an order.
Inventory management is especially important for burs and polishing tools because their performance changes with use. A simple stock system can identify items approaching reorder levels and separate unopened products from instruments ready for clinical use. Standardized naming also reduces errors when multiple brands have similar shapes.
Price alone should not determine clinical selection. A less expensive instrument may be appropriate if it meets the required specifications and performs consistently. A more costly instrument may be justified when it offers improved control, durability, or compatibility with a demanding workflow. The final decision should be based on documented performance and clinical need.
Training Requirements for the Dental Team
Training should cover instrument identification, intended use, handpiece operation, cooling, isolation, material compatibility, adjustment technique, and reprocessing. New staff should not be expected to learn the entire system through observation alone. A written instrument map or photo-based tray guide can support consistent preparation.
Clinical training should also emphasize when not to use an instrument. For example, a bur may be technically compatible with a handpiece but unsuitable for a particular restorative material or preparation stage. Recognizing limitations is as important as recognizing functions.
Team members should understand that manufacturer instructions are part of the safety framework. Speed ranges, pressure recommendations, sterilization parameters, and reuse limitations can vary significantly. Local infection-control requirements and professional standards must also be followed.
Periodic review is useful when the practice introduces a new ceramic system, scanner, cement, polishing kit, or preparation protocol. The instrument tray should evolve with the clinical workflow, but changes should be documented and communicated to everyone involved.
Training should include simulation or supervised practice when new rotary systems are introduced. Clinicians and assistants can review the sequence outside the patient appointment, identify missing accessories, and confirm how used instruments will be separated for reprocessing. This preparation reduces interruptions and improves team confidence.
When Specialized 인레이 기구 Are Appropriate
A specialized set may be appropriate when the practice performs a high volume of indirect restorations, uses a consistent material system, provides same-day milling, or requires a standardized preparation philosophy across several clinicians. Specialized instruments can improve repeatability when their geometry corresponds closely with the intended design.
However, a specialized set is not required for every case. Experienced clinicians may prefer a customized selection based on access, tooth anatomy, material, and personal technique. The important issue is whether the instruments provide sufficient control and whether the team can maintain, sterilize, and replace them properly.
Complex cases may require additional equipment beyond a basic inlay arrangement. Examples include deep or subgingival margins, limited mouth opening, difficult proximal access, extensive existing restorations, or a need for advanced moisture control. The operator should assess these conditions before treatment and plan the necessary support.
A specialized kit should be reviewed periodically. Preparation philosophies, restorative materials, scanning systems, and adhesive protocols evolve over time. A kit that was appropriate several years ago may contain redundant items or lack newer accessories that improve isolation, scanning, or finishing. Review should be based on actual clinical outcomes rather than marketing claims alone.
Frequently Asked Questions
What does 인레이 기구 mean?
인레이 기구 means instruments and related equipment used for dental inlay procedures. The category may include diagnostic tools, hand instruments, rotary burs, isolation equipment, impression or scanning devices, try-in tools, cementation accessories, and adjustment and polishing systems.
Is an 인레이 기구 set suitable for every inlay material?
No. The appropriate instruments depend on whether the restoration is made from ceramic, composite resin, gold alloy, or another material. Preparation and adjustment tools should be selected according to the material manufacturer’s recommendations and the clinician’s established protocol.
How many instruments are needed for an inlay procedure?
There is no universal number. A basic procedure may use a relatively compact arrangement, while a complex case or digital workflow requires additional equipment. The correct quantity depends on the treatment stages, isolation method, restorative material, and whether fabrication occurs in the clinic or laboratory.
Are diamond burs better than carbide burs for inlays?
Neither is universally better. Diamond and carbide burs have different cutting characteristics and may be selected for different stages. The decision should consider the substrate, desired preparation form, finishing requirements, handpiece, cooling, and operator preference supported by appropriate training.
Can the same bur be used on the tooth and the finished ceramic inlay?
It should not be assumed. A bur intended for tooth preparation may not provide the surface quality or cutting behavior required for ceramic adjustment. Use a tool specifically recommended for the restoration material and follow the applicable polishing sequence.
What is the most important factor when buying 인레이 기구?
Clinical suitability is the primary factor. The set should match the practice’s restorative materials, preparation technique, handpieces, isolation approach, sterilization process, and maintenance capacity. Product documentation and dependable replacement availability are also important.
How should used inlay instruments be processed?
Used instruments should be handled according to the practice’s infection-prevention policy, manufacturer instructions, and applicable regulations. Cleaning, inspection, packaging, sterilization, and storage requirements differ by instrument. Single-use components should not be reused unless the product is specifically designed and approved for that purpose.
Why does an inlay sometimes fail to seat during try-in?
Possible reasons include proximal contact, internal interference, debris, an inaccurate impression or scan, distortion, preparation undercuts, or an inaccurate restoration. The restoration should not be forced. The clinician should identify the source systematically and make only controlled, appropriate adjustments.
Do digital scanners eliminate the need for conventional inlay instruments?
No. Digital scanning changes how the preparation is recorded, but the procedure still requires diagnostic instruments, preparation burs, isolation equipment, finishing tools, try-in instruments, and cementation supplies. Digital workflows add scanning and software requirements rather than replacing the complete clinical setup.
How often should burs be replaced?
Replacement depends on the bur’s condition, material, use, manufacturer guidance, and clinical performance. Signs such as reduced cutting efficiency, vibration, visible damage, corrosion, or compromised fit indicate that the instrument should be removed from service. A fixed replacement interval may be useful, but it should be supported by inspection.
Can an inlay be adjusted without polishing afterward?
Adjustment may create a surface that requires finishing and polishing, particularly when ceramic or composite resin is involved. The appropriate sequence depends on the restorative material. A material-specific polishing system should be used to restore the intended surface quality as closely as possible.
What role does isolation play in the use of 인레이 기구?
Isolation improves visibility, controls moisture, protects the patient, and supports adhesive procedures. It allows the operator to use preparation and cementation instruments more predictably. The selected method should reflect the tooth location, margin position, patient factors, and material protocol.
Final Perspective
인레이 기구 is best understood as a coordinated clinical system rather than a single instrument or package. The system begins with diagnosis and visibility, continues through conservative preparation and accurate recording, and concludes with controlled try-in, cementation, adjustment, and maintenance. Every component has a specific role, but no instrument can replace sound case selection, careful isolation, accurate preparation, or adherence to material instructions.
For dental practices, the most reliable approach is to build an instrument workflow around actual clinical needs. Select burs and hand instruments that support the desired preparation design, choose isolation and recording equipment that matches the restorative protocol, and maintain a clear process for inspection, reprocessing, storage, and replacement. Supplier documentation, staff training, and material compatibility should be treated as essential purchasing criteria.
When these principles are applied consistently, 인레이 기구 can support precise and efficient indirect restorative care while helping the clinical team protect tooth structure, manage materials responsibly, and deliver a predictable patient experience. The strongest results come from integrating instrument quality with diagnosis, ergonomics, infection prevention, laboratory communication, and continuous review of clinical outcomes.