A Practical Guide to Inlay Instruments
This guide explains how 인레이 기구, or dental inlay instruments, support the diagnosis, preparation, fabrication, placement, and finishing of indirect tooth restorations. It reviews instrument categories, clinical workflow, material compatibility, infection-control requirements, ergonomic considerations, purchasing criteria, maintenance, and common mistakes. Inlays are custom restorations placed within the cusps of a prepared tooth, and the appropriate instruments help clinicians achieve controlled preparation, accurate adaptation, reliable bonding, and predictable occlusion.
What 인레이 기구 Means in Modern Dentistry
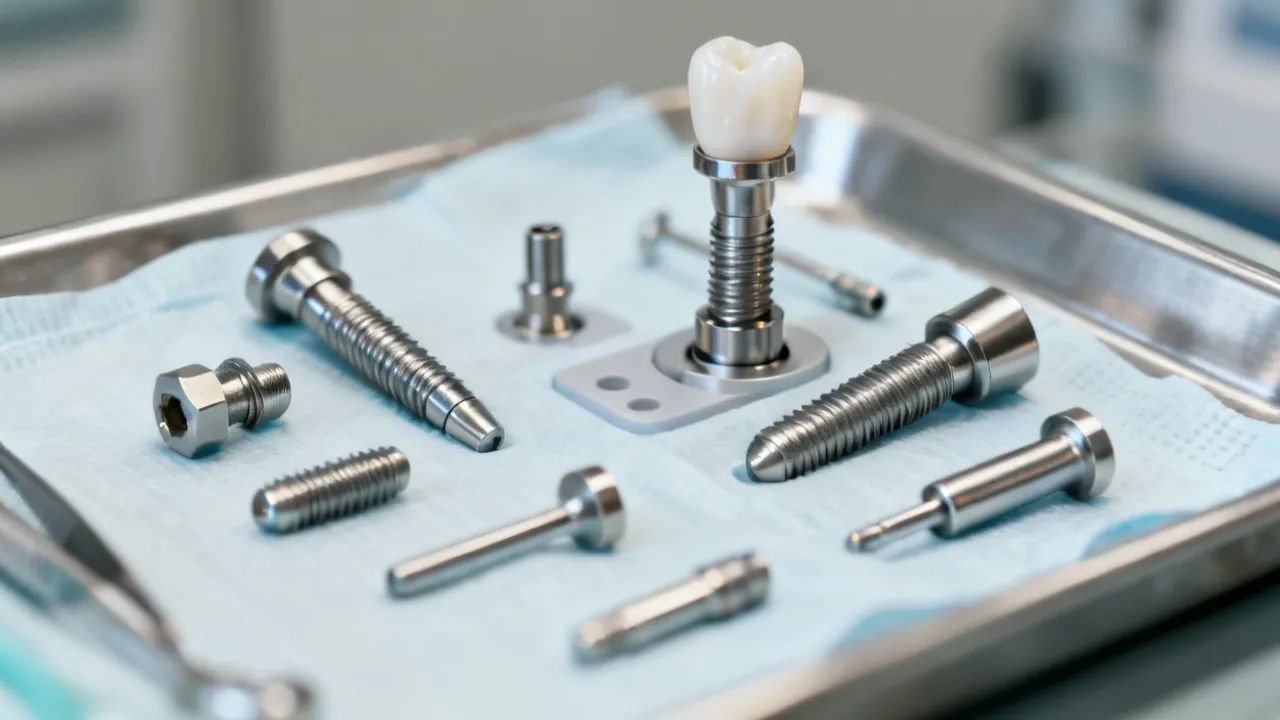
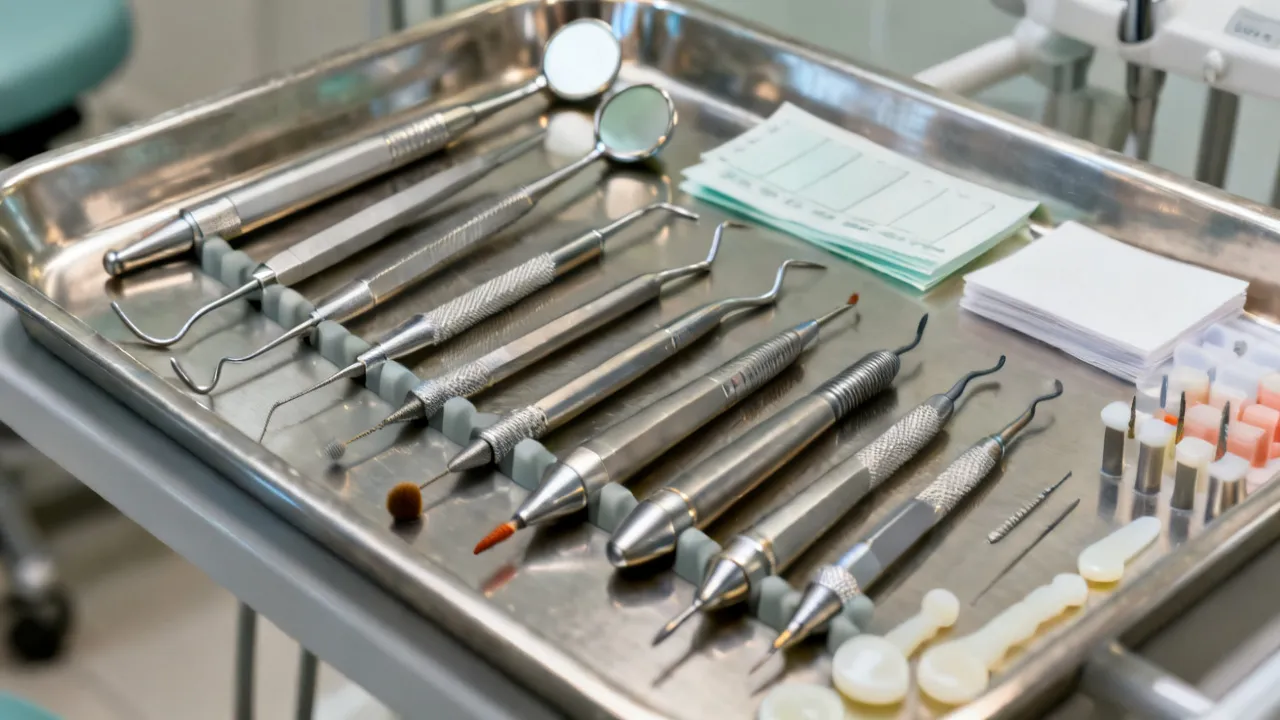
인레이 기구 refers to the instruments and related equipment used during the planning, preparation, fabrication, try-in, cementation, adjustment, and maintenance of dental inlays. In English-language dentistry, the term is generally translated as inlay instruments or inlay dental instruments. These tools are not necessarily a single standardized kit. Instead, they form a coordinated group of diagnostic, operative, restorative, rotary, isolation, bonding, and finishing instruments.
An inlay is an indirect restoration designed to fit within the internal portion of a prepared posterior tooth. Unlike an onlay, it does not normally cover one or more cusps. The restoration may be made from ceramic, resin-based composite, gold alloy, or another material selected according to the clinical situation and laboratory or chairside workflow. Because the restoration is fabricated outside the tooth and later bonded or cemented into place, success depends on more than the quality of the final material. The preparation design, impression or scan, occlusal record, isolation, cementation protocol, and finishing procedure must work together.
From an industry perspective, the most important point is that inlay instruments should be selected as a workflow rather than as isolated products. A highly precise diamond bur cannot compensate for poor moisture control. An excellent matrix system cannot correct an inaccurate proximal contact design. Likewise, a digital scanner does not remove the need for careful tissue management, margin inspection, and occlusal verification. The equipment should support the clinical objective at every stage.
The meaning of 인레이 기구 can therefore be broader than the name of a single dental tool. It may refer to the complete collection used for indirect restorative treatment, including instruments held by the dentist, accessories operated by the dental assistant, and equipment used by the laboratory or chairside milling team. Understanding this broader meaning is useful for purchasing, staff training, inventory control, and communication between clinics and dental laboratories.
Why Instrument Selection Matters
Indirect restorations require a controlled transition between tooth structure, restorative material, and luting agent. The instruments used during preparation influence wall taper, internal angles, margin smoothness, clearance, and the amount of sound tooth structure removed. Instruments used during placement influence seating, excess removal, proximal contact, marginal integrity, and occlusal comfort.
Several factors make inlay procedures technically sensitive:
- The preparation must provide sufficient space for the selected restorative material.
- Undercuts may interfere with seating or require modification of the preparation design.
- Margins must be visible and accessible for scanning, impression-making, finishing, and cleaning.
- Proximal contacts must be recreated without leaving excess material or an open contact.
- Bonding procedures are sensitive to contamination from saliva, blood, crevicular fluid, or unset temporary material.
- Occlusal adjustment must be conservative and followed by polishing appropriate to the restorative material.
- The clinician must preserve enough tooth structure to maintain resistance and retention while removing compromised tissue.
- The instruments must allow the operator to work efficiently without creating avoidable heat, vibration, or soft-tissue trauma.
The clinician should therefore assess instruments in relation to control, visibility, compatibility, sterilization, and repeatability. A product that looks similar to another instrument may perform differently because of its blade design, grit, shank geometry, coating, handle balance, or compatibility with a specific handpiece.
Instrument selection also influences the patient experience. A well-maintained handpiece and efficient bur can shorten preparation time, reduce vibration, and make the appointment more comfortable. A poorly chosen instrument may require greater pressure, repeated passes, or excessive adjustment. These effects can increase fatigue for the dental team and anxiety for the patient.
Core Categories of Inlay Instruments
A practical inlay setup normally includes several categories. The exact selection varies with the material, whether the restoration is produced in a dental laboratory or chairside, and whether conventional impressions or digital scanning are used.
| Instrument category | Primary purpose | Important selection considerations |
|---|---|---|
| Diagnostic instruments | Examine caries, cracks, existing restorations, margins, and occlusion. | Mirror quality, explorer design, handle ergonomics, visibility, and sterilization compatibility. |
| Preparation burs | Shape the cavity and establish the required clearance and margin form. | Bur geometry, grit sequence, concentricity, handpiece compatibility, and material-specific design. |
| Excavators and hand instruments | Remove softened dentin, refine areas of the preparation, and manage restorative materials. | Sharpness, tactile control, working-end size, and resistance to corrosion. |
| Isolation equipment | Control moisture and improve visibility during adhesive or cementation procedures. | Retraction, clamp selection, suction efficiency, patient comfort, and procedural access. |
| Impression or scanning tools | Record the prepared tooth, adjacent teeth, opposing arch, and occlusal relationship. | Scanner tip access, powder requirements where applicable, impression accuracy, tissue management, and data verification. |
| Try-in and seating instruments | Position the restoration, remove excess cement, and evaluate contacts and margins. | Non-damaging tips, visibility, access to proximal areas, and compatibility with the cement system. |
| Finishing and polishing instruments | Adjust occlusion, refine margins, and polish ceramic, composite, or metal surfaces. | Material compatibility, heat control, grit progression, and surface-finish requirements. |
| Maintenance and sterilization equipment | Clean, inspect, package, sterilize, and store reusable instruments. | Manufacturer instructions, washer compatibility, corrosion resistance, and tracking procedures. |
Some practices also include magnification systems, operating lights, isolation shields, dental photography equipment, articulators, occlusal analysis systems, and chairside milling or crystallization equipment within the wider category of inlay-related equipment. These items may not be called instruments in a narrow sense, but they influence the accuracy and reproducibility of the restorative process.
Diagnostic Instruments Before Preparation
Inlay treatment begins with diagnosis, not bur selection. A dental mirror, explorer, periodontal probe, cotton pliers, articulating paper, and appropriate radiographic or digital imaging support the initial assessment. These instruments help the clinician determine whether an indirect inlay is suitable or whether another treatment is more appropriate.
The diagnostic examination should consider the extent of caries, remaining enamel, existing restorations, cusp strength, crack patterns, pulp status, periodontal condition, occlusal loading, and the patient’s ability to maintain oral hygiene. A cavity that appears suitable for an inlay may require an onlay or full-coverage restoration if a cusp is undermined or if the remaining tooth structure cannot support the proposed design.
Explorers should be used thoughtfully. Excessive force can damage fragile margins or create misleading tactile impressions. Magnification and adequate illumination often provide more useful information than aggressive probing. A periodontal probe can help document margin position and soft-tissue conditions, while articulating paper or digital occlusal analysis may identify contacts that need consideration before preparation.
Radiographic evaluation may be appropriate when proximal caries, recurrent decay, pulpal involvement, or periapical concerns cannot be assessed clinically. The choice of imaging should follow professional judgment and applicable regulations. Imaging findings should be interpreted alongside symptoms, clinical tests, and the overall treatment plan.
Preoperative photographs may also be useful, particularly when shade, anatomy, fractured cusps, or existing occlusal wear must be documented. Photographs can help the clinician and laboratory communicate about anatomy and can provide a reference for reconstructing grooves, ridges, and contact areas. They may also help explain the treatment plan to the patient.
Occlusal analysis should not be postponed until after the restoration has been cemented. Existing wear facets, parafunctional signs, opposing restorations, and heavy contacts can affect the preparation and restorative design. When a patient has bruxism, clenching, or a complex occlusal scheme, the instrument workflow may need to include additional records and a more protective restorative plan.
Preparation Burs and Hand Instruments
Preparation burs are among the most recognizable components of 인레이 기구. Diamond burs are commonly used for cutting and shaping enamel, dentin, and existing restorative materials, while carbide burs may be selected for particular cutting or removal tasks. The appropriate instrument depends on the handpiece, tooth position, restorative material being removed, and the preparation design.
Common bur forms include round, pear, tapered fissure, shoulder, chamfer, flame, needle, and football shapes. A tapered bur can assist with controlled wall divergence, while a round bur may be useful for initial access or removal of softened dentin. Finishing diamonds with finer grit can smooth margins and reduce irregularities before scanning or impression-making. The bur should be used with suitable water spray and light, controlled pressure to reduce heat and avoid unnecessary removal of tooth structure.
Bur geometry should be considered as carefully as grit. A bur with an unsuitable taper may produce excessive divergence or an undercut. A bur that is too large may flatten anatomy and reduce the clinician’s ability to preserve sound tissue. An instrument that is too small may create grooves, roughness, or inconsistent clearance. A structured sequence is generally easier to control than switching randomly between shapes.
Hand instruments remain important even in digital workflows. Spoon excavators can help remove soft dentin in selected situations, while enamel hatchets, hoes, or margin trimmers may be used for controlled refinement when clinically indicated. These instruments provide tactile feedback that rotary tools do not always offer. Their cutting edges must be maintained according to the manufacturer’s recommendations, and damaged instruments should be removed from service.
Different handpieces may be used at different stages. A high-speed handpiece with water cooling is commonly selected for efficient cutting and preparation, while a low-speed or electric handpiece may be preferred for controlled finishing, temporary-material adjustment, and polishing. The operator should confirm that the bur is rated for the selected speed and that the chuck securely retains it.
Bur blocks and organized storage systems are useful for separating sterile instruments by sequence and grit. The storage system should prevent the working ends from contacting one another, because contact can dull cutting surfaces or damage delicate polishers. Clearly labeled compartments can also reduce the risk of using a coarse bur when a fine finishing instrument is intended.
Preparation Design and Instrument Control
Inlay preparations should be designed around the selected material and the biological needs of the tooth. Sharp internal angles may concentrate stress in some restorative materials, whereas rounded internal form can support more even stress distribution and improve the fit of certain indirect restorations. The exact geometry should follow the instructions of the restorative material manufacturer and the clinician’s training.
Preparation instruments should help establish:
- Clear margins that can be identified clinically and reproduced in a digital scan or conventional impression.
- A path of insertion that does not contain unintended undercuts.
- Appropriate occlusal and proximal clearance for the chosen material.
- Preservation of sound enamel and dentin whenever possible.
- Rounded or otherwise material-appropriate internal form.
- A stable seating area that supports predictable placement.
- Margins located where they can be finished, cleaned, and monitored during maintenance.
The clinician should inspect the preparation from multiple angles and use magnification where available. A fine finishing bur may improve the margin, but it should not be used to erase a fundamental design problem. If an area is too shallow, too narrow, or inaccessible, additional preparation may be necessary before proceeding to the impression or scan.
Industry experts commonly emphasize instrument concentricity and handpiece condition. A worn or eccentric bur may create vibration, uneven walls, and inaccurate margins. Handpieces should be maintained according to the manufacturer’s schedule, and burs should be discarded when their cutting efficiency declines or when visible damage occurs.
Clearance verification can be performed with wax, silicone, digital tools, or other methods selected by the clinician. The purpose is to ensure that the restoration has adequate thickness without unnecessarily enlarging the preparation. Checking clearance before the scan or impression is usually more efficient than discovering insufficient space during laboratory fabrication or try-in.
Proximal boxes require special attention because they are difficult to see and access. The clinician should protect adjacent teeth during preparation and ensure that the gingival floor is clear enough to be recorded and cleaned. A matrix or wedge may be useful in selected situations, particularly when a temporary material or a direct core build-up is involved.
Isolation and Soft-Tissue Management
Isolation is a central part of inlay instrumentation because adhesive procedures depend on a controlled field. Rubber dam systems, clamps, frames, forceps, floss ligatures, cotton rolls, absorbent pads, saliva ejectors, high-volume evacuation, and retraction materials may all be used according to the case.
Rubber dam isolation can improve visibility and reduce contamination during bonding and cementation. However, successful isolation requires careful clamp selection, protection of the gingiva, and verification that the dam remains stable during the procedure. If the margin extends close to the gingival tissue, retraction may be needed to expose the finish line without causing unnecessary trauma.
Retraction cords, pastes, wedges, and other soft-tissue management products should be selected with attention to the periodontal condition and the location of the margin. Bleeding must be controlled before scanning, impression-making, or bonding. A contaminated field may compromise the procedure even when the preparation and restoration are otherwise well designed.
Moisture control also affects patient comfort and operator ergonomics. Efficient suction placement reduces interruptions and helps the clinician maintain a stable working position. Assistants should be trained to anticipate instrument transfers, retraction needs, and material handling so that the operator can focus on seating and bonding steps.
When rubber dam isolation is not feasible, alternatives may include cotton-roll isolation, absorbent devices, retraction systems, and high-volume evacuation. These alternatives may be useful in selected cases, but the clinician should evaluate whether they provide sufficient control for the chosen adhesive procedure. The more moisture-sensitive the cementation protocol, the more carefully isolation must be planned.
Soft-tissue management should be gentle and deliberate. Excessive retraction can cause postoperative soreness, bleeding, or tissue recession. Instruments should expose the margin without crushing the papilla or creating a laceration. If bleeding begins during the procedure, the field should be stabilized before continuing rather than relying on repeated drying alone.
Impression and Digital Scanning Instruments
Once the preparation is complete, the restoration must be represented accurately. Conventional workflows may use impression trays, elastomeric impression materials, mixing systems, syringes, retraction accessories, and bite-registration materials. Digital workflows use an intraoral scanner, scanning tips, software, and a suitable data-transfer process.
The choice between conventional and digital recording depends on the practice, case complexity, access, operator experience, laboratory requirements, and patient factors. Neither approach eliminates the need for margin visibility and tissue control. A scanner cannot reliably record a margin that is covered by blood or fluid, and an impression cannot reproduce a preparation that was poorly designed.
Before scanning, the clinician should inspect the preparation for debris, dry the field appropriately, retract tissue, and confirm that the margin is visible. Scanning should proceed in a consistent path recommended by the device manufacturer. Excessive saliva, reflective surfaces, movement, and limited posterior access may interrupt data capture. The scan should be reviewed on screen rather than accepted automatically.
For conventional impressions, the tray must be rigid and adequately sized. The impression material should be mixed and handled within the manufacturer’s working time. Syringes or intraoral tips should deliver material around the preparation without trapping bubbles. After removal, the impression should be inspected for pulls, voids, tears, tray exposure, or incomplete capture of the finish line.
Occlusal records are also important. The laboratory or computer-aided design system needs information about the prepared arch, opposing arch, and relationship between them. A defective bite record can cause premature contacts that require unnecessary adjustment at insertion.
Digital scanners introduce additional instrument-management requirements. Scanner tips must be cleaned, disinfected, or sterilized according to the device instructions. Some systems use disposable sleeves, while others use autoclavable tips. The practice should understand the difference between wiping the scanner body and properly processing the intraoral component.
Scanner calibration and software updates may affect data quality. A scanner that has been dropped, overheated, or exposed to contamination should be inspected before clinical use. Operators should also avoid touching the optical surface with gloved fingers or abrasive materials. A damaged or cloudy scanning window can produce artifacts that are difficult to identify immediately.
Temporary Restoration Instruments
When the definitive inlay is not placed during the same appointment, a temporary restoration may be needed. Instruments can include temporary-material syringes, mixing pads, spatulas, matrix bands, occlusal adjustment burs, finishing instruments, and cement-removal tools.
The temporary restoration should protect the prepared tooth, maintain acceptable proximal contact, preserve occlusal function, and remain removable without damaging the preparation. Excess temporary cement should be removed carefully, particularly from the gingival and proximal areas. Floss can help clean contacts, but it should be passed through with controlled movement to avoid dislodging the temporary restoration.
Temporary materials may interfere with later bonding if residues remain on the preparation. The cleaning protocol should therefore be compatible with the definitive cement and restorative material. The clinician should follow the cement manufacturer’s guidance rather than assuming that one cleaning method is appropriate for every system.
Temporary restoration instruments should be separated from instruments intended for definitive adhesive procedures whenever possible. Residual temporary cement, oily debris, or polishing paste can contaminate bonding accessories. Microbrushes, mixing wells, and dispensing tips should be stored in a manner that protects them from dust and accidental contact.
A temporary inlay should also be evaluated for patient comfort. If the provisional restoration is too high, rough, loose, or difficult to clean, the patient may develop sensitivity or gingival irritation before the definitive appointment. A short follow-up conversation can reveal problems that are not obvious immediately after placement.
Try-In Instruments and Cementation Accessories
At the insertion appointment, try-in instruments help evaluate the restoration before final bonding or cementation. A mirror, explorer, cotton pliers, articulating paper, floss, try-in paste accessories, microbrushes, air-water syringe, suction, and non-damaging seating tools are commonly used.
The restoration should be inspected for marginal adaptation, internal fit, proximal contact, shade where relevant, surface condition, and occlusal relationship. If the inlay does not seat fully, the clinician should identify the cause rather than applying excessive force. Possible causes include debris, a small internal interference, an inaccurate impression or scan, an incorrect path of insertion, excess cement, or a defect in the restoration.
Adjustments should be conservative. The internal surface should not be modified casually because unnecessary grinding can alter fit or affect the treatment prescribed for the material. If adjustment is required, the appropriate instrument and polishing sequence must be used. Ceramic, resin-based composite, and metal restorations require different rotary instruments and surface-finishing methods.
During cementation, microbrushes, mixing tips, delivery syringes, curing-light accessories, dental floss, wedges, scalers, and specialized cement-removal instruments may be needed. Excess cement should be removed at the correct stage of setting. Removal too early may leave a film at the margin, while removal too late may require aggressive instrumentation.
Light-curing equipment should be checked for cleanliness, output, tip positioning, and compatibility with the cement. The curing protocol must follow the cement manufacturer’s instructions. A curing light should not be assumed to deliver adequate energy merely because it turns on; routine maintenance and verification are part of quality assurance.
Try-in pastes can help assess shade in aesthetic areas, but they must be completely removed before final cementation. Residual paste in the internal surface or preparation may affect seating and bonding. The cleaning step should be performed carefully, with attention to proximal and gingival areas.
During final seating, the operator should have a clear view of the restoration and an efficient method for maintaining pressure. Some cases benefit from a seating instrument with a broad, non-abrasive end, while other cases can be stabilized with a suitable bite stick or finger pressure. The chosen method should avoid fracturing thin restorative areas or moving the inlay while excess cement is being removed.
Finishing, Polishing, and Occlusal Adjustment
Finishing instruments are selected according to the restorative material. Fine diamonds, carbide finishing burs, abrasive discs, rubber points, polishing wheels, brushes, and diamond-impregnated systems may be used in different sequences. The objective is not simply to create a glossy surface. The clinician must also preserve the margin, maintain anatomy, avoid overheating, and achieve a functional occlusal relationship.
Ceramic restorations often require material-specific adjustment and polishing systems. Resin-based materials may respond differently to carbide or abrasive polishers. Gold and other metal restorations require another approach altogether. The product instructions should identify the suitable instrument sequence and recommended operating conditions.
Occlusal adjustment should be based on the patient’s functional contacts rather than on the desire to remove visible marks indiscriminately. Articulating paper can identify contacts, but it should be interpreted in context. The patient’s bite, excursions, adjacent teeth, and preoperative records may all be relevant. After adjustment, the surface should be polished to reduce roughness and support patient comfort and hygiene.
Excessive pressure, inadequate water cooling, or prolonged contact with a rotary instrument can generate heat and damage the restoration or tooth. The operator should use intermittent contact, appropriate speed, and the correct abrasive. A final inspection under magnification can help reveal marginal chips, scratches, or residual cement.
Polishing is particularly important on surfaces that contact the opposing dentition or lie near the gingiva. A rough surface may retain plaque, irritate soft tissue, or accelerate wear on the opposing tooth. The final surface should be checked visually and, where appropriate, with an explorer used gently to detect ledges or excess material.
Interproximal finishing requires special caution. Abrasive strips, finishing discs, and narrow burs can damage adjacent teeth or open a contact if used aggressively. The clinician should support the instrument, protect the neighboring tooth, and verify contact again after any adjustment. Floss should pass through with appropriate resistance rather than being forced or left completely loose.
Material Compatibility
One of the most frequent purchasing errors is treating all inlay instruments as interchangeable. They are not. The selected instrument must be compatible with the tooth, the restorative material, the cement system, and the finishing objective.
| Restorative material | Instrument planning considerations | Key clinical caution |
|---|---|---|
| Ceramic | Use preparation burs and polishing systems specified for the ceramic type. | Prevent overheating and avoid unplanned internal or marginal grinding. |
| Resin-based composite | Select finishing and polishing instruments that create a smooth surface without excessive material removal. | Check the manufacturer’s recommendations for adjustment and surface treatment. |
| Gold alloy | Use appropriate carbide or abrasive instruments for contouring and polishing. | Preserve the intended contact and margin while avoiding unnecessary alteration. |
| Hybrid or reinforced materials | Follow the product-specific bur, etching, priming, and polishing guidance. | Do not transfer a ceramic protocol to a different material without verification. |
Surface treatment is especially material-dependent. Etching, airborne-particle abrasion, silane application, universal primers, and adhesive systems are not automatically interchangeable. The clinician should verify whether the treatment is intended for the internal surface, tooth substrate, or both, and should observe the manufacturer’s sequence and timing.
For glass-containing ceramics, a particular etching and silane protocol may be indicated, whereas polycrystalline ceramics may require a different surface-conditioning approach. Resin-based blocks may need cleaning, abrasion, primer application, or another specified treatment. These distinctions make it important to identify the exact restoration before opening the cementation kit.
The instruments used for surface treatment should also be protected from cross-contamination. Sandblasting nozzles, etching syringes, primers, and bonding applicators should be handled according to their intended use. Air abrasion requires appropriate eye protection, suction, and control of powder distribution. The practice should make sure that staff understand which accessories are disposable and which require reprocessing.
Infection Prevention and Instrument Reprocessing
Reusable 인레이 기구 must be managed within the dental practice’s infection-prevention system. The Centers for Disease Control and Prevention’s Guidelines for Infection Control in Dental Health-Care Settings, along with local regulations and professional standards, provide a framework for cleaning, sterilization, storage, and documentation.
Reprocessing generally involves point-of-use handling, safe transport, cleaning, inspection, packaging, sterilization, cooling, and storage. The details depend on the instrument design and manufacturer’s instructions. Hinged instruments may need to be opened during cleaning. Rotary instruments must be examined for debris and damage. Instruments with lumen or complex surfaces may require specific cleaning equipment.
Ultrasonic cleaners and instrument washers can improve consistency, but they do not replace inspection. Cleaning must occur before sterilization because residual organic material can interfere with the sterilization process. Sterile packs should be stored in a manner that protects them from moisture, puncture, dust, and unnecessary handling.
Dental burs deserve particular attention. Some are intended for single use, while others may be reprocessed only under defined conditions. A bur should not be reused simply because it appears intact. Loss of cutting efficiency can increase operating time, pressure, vibration, and heat. The practice should maintain a clear policy for disposal, reprocessing, and inventory rotation.
Instrument inspection should include the working end, shank, handle, hinge, and any connection points. Rust, pitting, cracks, bent components, loose parts, or residue may indicate that the instrument should be removed from service. Staff should not use an instrument merely because it has completed a sterilization cycle; sterility and functional integrity are separate quality requirements.
Packaging and labeling systems can support traceability. A practice may record sterilization dates, cycle information, instrument sets, and maintenance events according to its policy and local requirements. Traceability is especially valuable when the practice is investigating a clinical problem or updating its reprocessing procedures.
Ergonomics and Operator Efficiency
Instrument design affects both precision and physical strain. Handles with a suitable diameter, balanced weight, and non-slip surface can improve control. Rotary instruments should run smoothly, and the handpiece should be positioned to support neutral wrist posture. Poor ergonomics may contribute to fatigue and inconsistent preparation quality over a long clinical day.
Instrument organization also influences efficiency. A tray arranged in procedural order can reduce searching and unnecessary hand movement. A typical sequence may place diagnostic instruments first, followed by isolation, preparation burs, impression or scanning accessories, temporary materials, and cementation instruments. The exact layout should be adapted to the operator and assistant.
Color coding or labeled bur blocks can help distinguish coarse, medium, fine, and extra-fine instruments. However, labels should remain legible after cleaning and should not replace visual inspection. Digital inventory systems may assist with stock rotation, instrument tracking, and maintenance records in larger practices.
Ergonomic planning should include the assistant’s position and the location of the curing light, suction tubing, scanner, and restorative materials. Equipment placed outside the operator’s normal reach can cause repeated twisting or shoulder elevation. Over time, small inefficiencies can contribute to musculoskeletal strain and slower procedures.
Training new staff with a standardized tray layout is also helpful. The team should know the purpose of each instrument, the sequence in which it is used, and the appropriate replacement process. A clear system reduces instrument-search time and makes it easier to identify missing or contaminated items before treatment begins.
How to Evaluate Inlay Instruments Before Purchase
Price is only one part of the purchasing decision. A lower initial price may be offset by short service life, inconsistent cutting, difficult reprocessing, or incompatibility with the practice’s handpieces. Conversely, a premium instrument is not automatically the best choice for every procedure.
A structured evaluation should include the following questions:
- What clinical workflow will the instrument support? Define whether it is intended for preparation, scanning, cementation, adjustment, or polishing.
- Which materials will be treated? Confirm that the bur or polisher is designed for ceramic, composite, metal, or the relevant combination.
- Is it compatible with existing equipment? Check shank type, handpiece connection, speed range, cooling requirements, and curing-light accessories.
- Can it be cleaned and sterilized according to practice requirements? Review the instructions for use before purchase.
- Does the supplier provide technical documentation? Product identification, intended use, reprocessing guidance, and warranty terms should be clear.
- How consistent is the instrument? Look for reliable manufacturing, secure packaging, and quality-control information.
- Will replacement units be available? A workflow should not depend on a product that is difficult to reorder.
- Does the instrument improve control or merely add duplication? Avoid building a kit filled with instruments that perform the same task.
- Can the product be evaluated in a controlled trial? Testing a small quantity may reveal handling or durability problems before a large purchase.
Supplier evaluation should include regulatory compliance in the relevant market, traceability, customer support, delivery reliability, and clarity of labeling. Dental practices should verify claims independently and should not rely solely on promotional language. Product literature, recognized standards, and professional guidance are more useful than unsupported performance statements.
Total cost of ownership is another useful consideration. The purchase price should be considered together with expected service life, reprocessing cost, replacement frequency, chair time, and the potential cost of remakes or complications. An instrument that costs slightly more but cuts consistently and lasts longer may be economically preferable.
Practices should also avoid overstocking specialized products. Excess inventory can expire, become obsolete, or remain unused while staff members develop inconsistent preferences. A periodic inventory review can identify duplicate items, frequently missing items, and instruments that are no longer compatible with the practice’s restorative materials.
Step-by-Step Inlay Instrument Workflow
Step 1: Confirm the diagnosis and treatment plan
Review clinical findings, radiographs where indicated, occlusion, periodontal conditions, and the remaining tooth structure. Decide whether an inlay is appropriate or whether an onlay, direct restoration, endodontic treatment, or another option is indicated.
Step 2: Select the restoration and instrument protocol
Identify the restorative material and whether the case will be completed through a laboratory or chairside digital workflow. Select preparation burs, isolation devices, recording tools, temporary materials, cementation accessories, and polishing instruments that are compatible with the plan.
Step 3: Establish visibility and isolation
Position the patient comfortably, arrange illumination and magnification, and apply the selected isolation method. Manage saliva and soft tissue before beginning preparation. Confirm that the assistant can maintain suction and provide instruments without disrupting the field.
Step 4: Remove disease and old restorative material
Use suitable rotary and hand instruments to remove caries or defective material while preserving sound tooth structure. Inspect the cavity carefully for unsupported enamel, cracks, and areas that may compromise the proposed path of insertion.
Step 5: Develop the preparation form
Use the selected burs to create a material-appropriate preparation with visible margins, sufficient clearance, and no unintended undercuts. Refine the walls and internal surfaces conservatively. Rinse, dry appropriately, and inspect the preparation from multiple angles.
Step 6: Record the preparation
For a digital workflow, control moisture and scan the preparation, adjacent teeth, opposing arch, and occlusal relationship. For a conventional workflow, manage tissue, select a rigid tray, mix the impression material correctly, and inspect the impression after removal. Repeat the record if the margin is incomplete or distorted.
Step 7: Protect the tooth when necessary
Place and adjust a temporary restoration if the definitive inlay will be delivered later. Verify that the temporary restoration does not create an uncomfortable occlusal interference or irritate the gingiva.
Step 8: Evaluate the definitive inlay
Before cementation, inspect the restoration and compare it with the preparation. Check fit, contacts, margins, shade where relevant, and occlusion. Identify the reason for any seating resistance before making adjustments.
Step 9: Prepare the tooth and restoration
Clean the tooth and treat the internal surface of the restoration according to the selected material and cement system. Maintain isolation throughout. Follow the manufacturer’s instructions for etching, priming, adhesive application, and curing.
Step 10: Seat, remove excess, and cure or allow setting
Apply the cement in a controlled manner and seat the inlay along the planned path. Stabilize it while removing excess material. Use floss and appropriate instruments for proximal cleanup. Cure or allow the cement to set according to the product instructions.
Step 11: Verify occlusion and polish
Check static and functional contacts. Make only necessary adjustments using material-appropriate instruments. Polish adjusted areas and inspect the margins for residual cement, chips, or gaps.
Step 12: Document and provide aftercare
Record the material, cement, relevant lot information where required, occlusal adjustments, and any patient instructions. Explain expected sensitivity, oral hygiene, and when to contact the practice if discomfort, mobility, or bite changes occur.
In a laboratory workflow, communication at each transition is important. The prescription should identify the preparation type, material, shade requirements, occlusal information, contact expectations, and any special design requests. A well-written prescription reduces ambiguity and helps the laboratory select compatible fabrication and finishing procedures.
In a chairside CAD/CAM workflow, the operator must also confirm the milling block, crystallization or sintering requirements, milling burs, furnace settings where applicable, and polishing system. The digital design should be reviewed for anatomy, contact strength, material thickness, and occlusal clearance before manufacturing begins. A rapid digital workflow is valuable only when each verification step is retained.
Common Errors in Inlay Instrument Use
Several recurring errors are associated with indirect restorative procedures. The first is using a preparation bur without considering the final material. A preparation that is acceptable for one restoration may provide inadequate clearance or an unsuitable margin for another.
The second is continuing to scan or take an impression despite an unclear margin. Digital or conventional recording cannot reliably correct poor visibility. Tissue management should be addressed before the record is made.
The third is using excessive force during seating. An inlay should not be forced into position. Pressure can damage a fragile restoration, fracture a thin tooth wall, or obscure the actual source of interference.
The fourth is relying on a single finishing instrument. Adjustment and polishing usually require a sequence. A coarse instrument may remove material efficiently but leave a rough surface. A fine polisher may create a better finish but may not be suitable for correcting a large occlusal discrepancy.
The fifth is neglecting instrument wear. Dull burs increase vibration and heat and may make the preparation less predictable. A documented replacement policy is more dependable than waiting for visible failure during treatment.
The sixth is mixing protocols from different manufacturers without checking compatibility. Adhesive systems, primers, cements, surface treatments, and curing devices may have specific requirements. The instructions for use should be treated as part of the instrument and material selection process.
Another common error is failing to verify the adjacent tooth after proximal preparation. Even a small iatrogenic scratch can complicate finishing, create sensitivity, or affect the patient’s perception of treatment quality. A protective matrix, wedge, or appropriately positioned hand instrument may help reduce this risk.
Inadequate drying is also problematic. The field should not be treated as either completely wet or excessively desiccated without regard to the adhesive system. The recommended substrate condition varies by technique and product. Staff should know when to use air, suction, cotton, or a controlled drying method.
Finally, some teams fail to distinguish between seating verification and final cementation. The restoration should be evaluated before the cement is mixed or delivered. This allows the operator to identify fit or contact issues without the pressure of a setting cement and reduces the likelihood of trying to correct a problem after bonding.
Quality Assurance in the Dental Practice
Quality assurance begins with standardization. A practice can develop a written inlay protocol that lists the preferred instruments, compatible materials, isolation steps, scanning or impression sequence, cementation method, and reprocessing requirements. Standardization does not prevent clinical judgment; it reduces avoidable variation.
Periodic review may include:
- Inspection of burs for wear, corrosion, distortion, and contamination.
- Verification that sterilization indicators and records are handled according to policy.
- Review of curing-light function and maintenance.
- Assessment of scanner calibration and software updates where applicable.
- Evaluation of instrument availability during common posterior procedures.
- Documentation of remakes, debonding, postoperative sensitivity, or repeated occlusal adjustments.
- Review of staff competency in instrument identification, transfer, cleaning, packaging, and storage.
Clinical outcomes should be interpreted carefully. A remake does not always indicate an instrument problem, and a satisfactory immediate fit does not prove long-term success. Case selection, patient factors, tooth condition, material choice, cementation, and maintenance all contribute to performance. Practices should use records and professional review rather than unsupported conclusions.
Audits can be simple and practical. A practice may observe whether preparation burs are available in the correct sequence, whether scanner tips are processed correctly, whether cementation accessories are within their expiration dates, and whether polishing kits are being used with the correct material. The objective is to identify preventable variation before it affects patient care.
Staff feedback can also improve the system. Assistants often recognize recurring problems such as missing wedges, insufficient suction tips, mislabeled burs, or delays in obtaining laboratory records. A short debrief after complex cases can identify workflow changes that improve both efficiency and safety.
Patient Communication and Inlay Treatment
Although 인레이 기구 are primarily clinical tools, patient communication influences the procedure. Patients should understand that an inlay is a custom restoration placed inside a prepared tooth and that treatment may involve one or more appointments. They should be informed about the reason for the restoration, material options, possible sensitivity, temporary protection when applicable, and the need for follow-up.
Patients may also ask why a dentist uses several burs or why a restoration is tried in more than once. A concise explanation can improve confidence: each instrument has a specific purpose, such as removing diseased tissue, shaping the preparation, refining the margin, checking the fit, or polishing the final surface.
After cementation, patients should receive practical instructions about brushing, interdental cleaning, chewing comfort, and signs that require professional review. Persistent pain, a high bite, sensitivity that does not improve, a loose restoration, or food impaction should be assessed by the treating dental professional.
Communication is especially important when the patient is receiving a temporary restoration. The patient should know that a temporary may feel slightly different, may require careful chewing, and should be reported if it becomes loose or uncomfortable. Patients should not attempt to re-cement a restoration themselves with household adhesives or unapproved products.
For patients comparing ceramic, composite, and metal options, the clinician should explain that no material is universally ideal. Strength, aesthetics, tooth location, occlusal forces, available clearance, bonding requirements, cost, and personal preferences may influence the selection. The instrument workflow is then adapted to the chosen material rather than selected independently of it.
Regulatory and Evidence Considerations
Dental instruments are subject to different regulatory classifications and requirements depending on the country and intended use. Practices should verify the applicable rules in their jurisdiction and purchase through legitimate dental channels. Claims about durability, cutting efficiency, sterilization, or clinical superiority should be supported by manufacturer documentation or suitable evidence.
Reliable background sources may include the World Health Organization’s infection-prevention resources, national dental infection-control guidance, the U.S. Centers for Disease Control and Prevention, recognized dental standards organizations, peer-reviewed restorative dentistry research, and the manufacturer’s current instructions for use. These sources should be consulted for changing technical requirements rather than relying on informal product summaries.
Evidence should also be interpreted in context. Laboratory testing may measure cutting performance or surface roughness under controlled conditions, but clinical outcomes involve patient anatomy, operator skill, contamination control, restoration design, cementation, and follow-up. An expert assessment therefore combines technical data with practical workflow considerations.
Purchasers should be cautious about products that use broad claims such as “universal,” “self-adjusting,” or “compatible with all materials.” Such language may describe convenience rather than complete clinical compatibility. The detailed instructions for use should identify limitations, recommended speeds, cooling requirements, surface-treatment steps, and reprocessing conditions.
Continuing education is another important evidence-based resource. Dental professionals should maintain familiarity with changes in adhesive dentistry, digital scanning, restorative materials, infection prevention, and occupational safety. Manufacturers may provide technical training, but product education should be considered alongside independent professional education and current clinical guidance.
Frequently Asked Questions
What are 인레이 기구?
인레이 기구 means dental inlay instruments. The term covers the diagnostic, preparation, isolation, impression or scanning, temporary-restoration, try-in, cementation, adjustment, polishing, and reprocessing tools used for indirect inlay procedures.
Are inlay instruments sold as one universal kit?
Some manufacturers offer organized sets, but there is no universal kit suitable for every case. The selection depends on the tooth, preparation design, restorative material, clinical workflow, handpiece, isolation method, and cementation system.
Which burs are commonly used for inlay preparation?
Common forms include round, pear, tapered fissure, chamfer, shoulder, flame, and football burs. The correct shape and grit depend on the preparation objective and the selected restorative material. Manufacturer guidance and clinical training should determine the final sequence.
Can the same polishing instrument be used for ceramic and composite inlays?
Not necessarily. Ceramic, resin-based composite, hybrid materials, and metal respond differently to adjustment and polishing. Use a system identified for the relevant material and follow its operating instructions.
Is digital scanning enough to ensure an accurate inlay?
No. Digital scanning can record prepared surfaces efficiently, but it cannot compensate for poor margin visibility, contamination, tissue movement, inadequate clearance, or an unstable preparation. The scan must be reviewed for completeness and quality.
How can a clinician reduce the risk of an open proximal contact?
Careful preparation, accurate impression or scanning, suitable contact design, controlled cementation, and verification with dental floss are important. The contact should be evaluated before final cementation when possible, and adjustments should be conservative.
What should be done if the inlay does not seat fully?
Do not force it. Inspect the preparation, restoration, internal surface, proximal contacts, and path of insertion. Remove debris and identify the interference. If the problem cannot be resolved predictably, the restoration and preparation should be reassessed by the treating clinician.
How often should dental burs be replaced?
There is no single replacement interval for all burs. Replacement depends on the instrument type, material cut, frequency of use, reprocessing method, visible damage, and loss of cutting efficiency. The practice should follow manufacturer guidance and its own quality-control policy.
Can reusable inlay instruments be sterilized in a dental office?
Many reusable instruments are designed for validated cleaning and sterilization procedures, but not all products are interchangeable. The instrument’s instructions for use, the sterilizer requirements, and local infection-control regulations must be followed.
What is the difference between an inlay and an onlay?
An inlay is generally positioned within the cusps of a prepared tooth, while an onlay extends over one or more cusps. The distinction affects preparation design, material clearance, instrument selection, and the overall restorative plan.
Do inlay instruments need special maintenance?
They require routine inspection, cleaning, sterilization when indicated, lubrication or handpiece maintenance according to instructions, and proper storage. Rotary instruments should be checked for wear, vibration, corrosion, and damage before use.
What is the most important consideration when buying inlay instruments?
Compatibility with the intended clinical workflow is usually more important than appearance or price alone. Confirm the instrument’s purpose, material compatibility, handpiece connection, reprocessing instructions, technical documentation, availability, and supplier support.
Are magnification and illumination considered part of 인레이 기구?
In a narrow definition, magnification and illumination are equipment rather than instruments. In a practical workflow, however, they are closely related because they improve margin visibility, preparation control, cement removal, and final inspection.
Why is water cooling important when using rotary instruments?
Water cooling helps control heat generated during cutting and adjustment. The correct cooling method depends on the instrument, handpiece, speed, and manufacturer’s instructions. The operator should also avoid excessive pressure and prolonged contact.
Can a dentist use ordinary restorative instruments for an inlay procedure?
Some general restorative instruments are useful, but they may not provide the geometry, access, or material compatibility required for every inlay case. The clinician should select instruments based on the specific preparation and cementation protocol.
Conclusion
Effective use of 인레이 기구 depends on coordinated planning rather than possession of a large instrument collection. Diagnostic tools establish whether an inlay is appropriate. Preparation burs and hand instruments shape the tooth with controlled preservation of sound structure. Isolation equipment protects the adhesive field. Scanning or impression tools transfer the preparation accurately. Try-in, cementation, adjustment, and polishing instruments complete the restoration while supporting marginal integrity and patient comfort.
From an expert clinical perspective, the strongest purchasing strategy is to build a documented, material-compatible workflow and review it regularly. Instruments should be traceable, maintained, properly reprocessed, and replaced when their performance declines. By matching each instrument to a clearly defined task and following evidence-informed manufacturer guidance, dental teams can improve consistency without relying on exaggerated product claims or unnecessary equipment.
The most useful definition of 인레이 기구 is therefore functional: it is the coordinated instrument system that helps the dental team move from diagnosis to a precise, clean, well-seated, and maintainable indirect restoration. When every instrument has a defined role, when the team understands the sequence, and when materials and equipment are selected together, the procedure becomes more predictable and easier to evaluate. This approach supports efficient clinical work while keeping preservation of tooth structure, moisture control, patient safety, and long-term restorative performance at the center of treatment.