A Practical Guide to Dental Inlay Instruments
This guide explains how 인레이 기구, or dental inlay instruments, support the assessment, preparation, impression, placement, and finishing of indirect tooth restorations. It distinguishes hand instruments, rotary devices, isolation systems, bonding equipment, and digital workflows while emphasizing selection, sequencing, infection control, ergonomics, and clinical verification. The discussion is intended for dental professionals, students, procurement teams, and patients seeking an objective overview of the instruments used in contemporary inlay treatment.
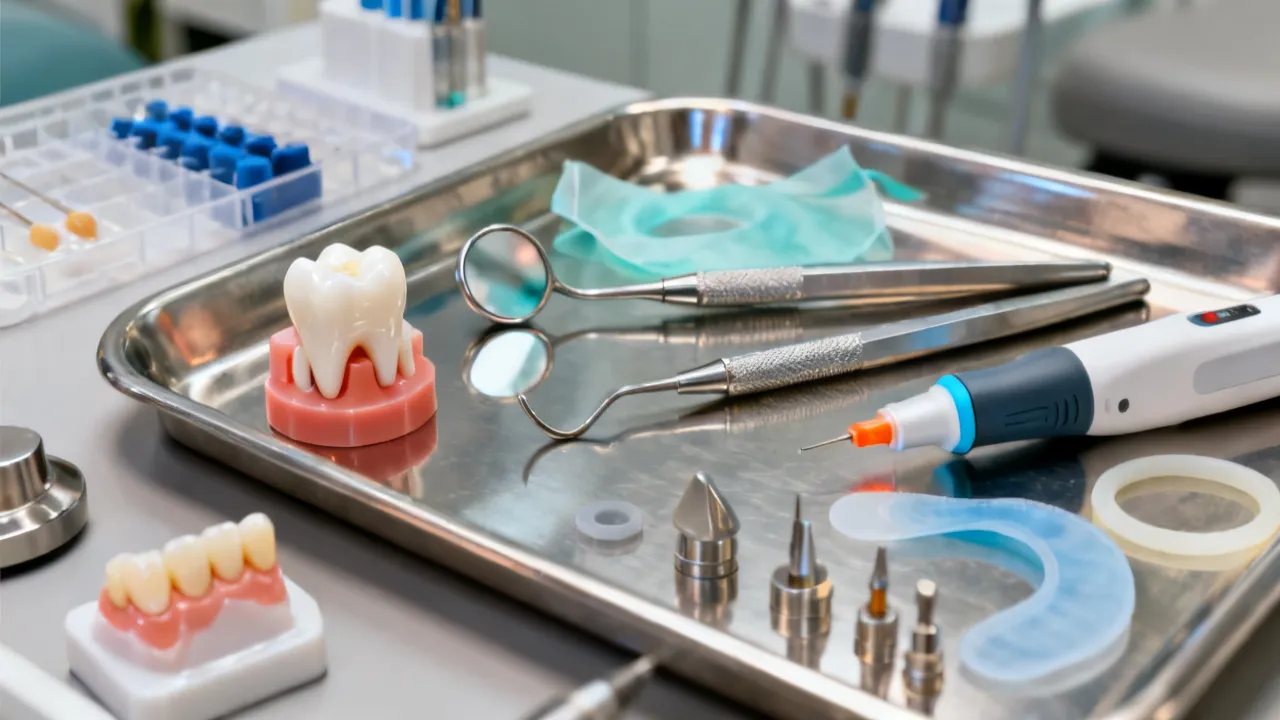
Understanding 인레이 기구 in Contemporary Dentistry
인레이 기구 refers to the instruments, accessories, and supporting equipment used during the planning, preparation, fabrication, try-in, bonding, adjustment, and maintenance of a dental inlay. In English-language dental practice, the term is generally understood as dental inlay instruments or instruments for indirect restorative treatment. An inlay is a custom-made restoration fabricated outside the mouth and then placed within the prepared contours of a tooth. Unlike a crown, it does not normally cover the entire clinical crown, and unlike a direct filling, it is produced separately before final cementation or adhesive bonding.
Inlays are commonly considered when a tooth has more structural damage than is suitable for a small direct restoration but still retains enough healthy enamel and dentin to avoid full-crown coverage. They may be fabricated from ceramic, resin-based composite, metal, or other restorative materials selected according to functional demands, esthetic expectations, available space, occlusion, and the clinician’s treatment plan. Each material places different demands on preparation instruments, surface-conditioning accessories, cementation systems, and finishing devices.
The most important point for clinical teams is that an inlay procedure is not supported by one special instrument. It depends on a coordinated system. Diagnostic instruments identify the extent of disease and the condition of the tooth. Rotary instruments shape the cavity according to restorative requirements. Isolation equipment controls moisture. Impression or scanning tools transfer the preparation to a laboratory or digital design platform. Try-in and bonding instruments help confirm marginal fit, proximal contact, occlusion, and cementation. Finishing and polishing systems then refine the restoration and protect the surrounding enamel.
From an industry expert’s perspective, purchasing decisions should begin with the treatment protocol rather than with a catalog category. A clinic that mainly places ceramic inlays may prioritize fine-grit diamond burs, optical magnification, a reliable rubber dam system, adhesive accessories, and polishing kits. A clinic using laboratory-fabricated metal or composite inlays may require a different set of finishing instruments and casting or laboratory communication tools. Digital dentistry can reduce some conventional steps, but it does not eliminate the need for accurate preparation, moisture control, clinical inspection, or careful occlusal adjustment.
What Makes an Inlay Procedure Different?
An inlay procedure involves more than removing caries and filling a cavity. It requires the tooth and the restoration to function as a carefully matched pair. The preparation must be shaped so that the restoration can be fabricated accurately and inserted along a controlled path. The restoration must then reproduce appropriate anatomy, establish a stable proximal relationship, and maintain a harmonious occlusion.
Indirect treatment also introduces a communication stage between the clinic and the laboratory or CAD/CAM system. Any error made during preparation, impression taking, scanning, bite registration, design, milling, or firing can influence the final result. This is why instrument selection should be viewed as part of a quality-management process. A dependable inlay workflow is built from many small controls rather than from one expensive piece of equipment.
Compared with a direct filling, an inlay may provide more predictable anatomy and contact in selected situations because the restoration is fabricated outside the mouth. However, it requires additional appointments or equipment, careful temporary protection when necessary, and a precise bonding or cementation protocol. The instruments must support both the biological needs of the tooth and the mechanical and esthetic requirements of the restoration.
Why Instrument Selection Matters
Inlay treatment is highly dependent on precision. The restoration must fit the prepared cavity, maintain healthy tooth structure where possible, provide an appropriate path of insertion, and support a durable adhesive or cementation procedure. Instrument choice influences all of these stages.
- Diagnostic accuracy: Clear visualization and reliable examination instruments help distinguish caries, cracks, defective restorations, and sound tooth structure.
- Conservative preparation: Appropriate burs and hand instruments allow the clinician to remove compromised tissue while controlling preparation geometry.
- Moisture control: Rubber dam components, clamps, wedges, suction, and retraction tools improve the working field during adhesive procedures.
- Restoration verification: Try-in instruments, articulating paper, floss, explorers, and magnification support the evaluation of fit and function.
- Surface management: Etching, silanization, priming, cement placement, finishing, and polishing require compatible accessories and disciplined sequencing.
- Patient safety: Properly maintained instruments and validated sterilization procedures help reduce cross-contamination risks.
- Operator efficiency: A well-organized tray reduces interruptions, prevents unnecessary searching, and helps the dental assistant anticipate each stage.
- Long-term value: Durable instruments can reduce replacement frequency, but only when they are maintained and used within their intended limits.
Instruments should therefore be evaluated by clinical purpose, compatibility, durability, maintenance requirements, and operator ergonomics. A low purchase price may not represent good value if a bur cuts inconsistently, a clamp distorts the soft tissue, or a polishing system is incompatible with the restorative material. Conversely, a premium instrument may not be a sensible purchase if the clinic rarely performs the procedure or lacks the training and equipment required to use it effectively.
Major Categories of 인레이 기구
A complete inlay setup can be organized into several practical categories. This classification helps dental practices establish treatment trays, identify missing components, and train new staff. It also makes inventory management more transparent because each instrument can be connected to a particular clinical task.
| Category | Typical Instruments or Equipment | Primary Clinical Purpose |
|---|---|---|
| Diagnostic | Mouth mirror, explorer, periodontal probe, cotton pliers, radiographic or imaging equipment | Assess tooth structure, margins, contacts, symptoms, and surrounding tissues |
| Preparation | High-speed handpiece, low-speed handpiece, diamond burs, carbide burs, hand excavators | Remove diseased tissue and shape the cavity |
| Isolation | Rubber dam, clamp, frame, punch, forceps, saliva ejector, high-volume evacuation | Control moisture, visibility, and soft-tissue interference |
| Matrix and separation | Sectional matrices, circumferential bands, wedges, separation rings | Protect adjacent teeth and manage proximal contours when required |
| Impression or scanning | Intraoral scanner, scan powder where indicated, impression trays, elastomeric materials, mixing accessories | Capture the prepared tooth and occlusal relationship |
| Try-in and bonding | Microbrushes, applicators, cement spatulas, isolation accessories, curing light, floss | Condition surfaces, apply adhesive materials, seat the restoration, and remove excess |
| Finishing and polishing | Fine diamonds, finishing discs, abrasive strips, silicone polishers, occlusal adjustment tools | Refine margins, contacts, surface texture, and occlusion |
| Maintenance and processing | Instrument cassettes, ultrasonic cleaner, washer-disinfector, sterilization pouches, inspection light | Clean, inspect, package, sterilize, and store reusable instruments |
Diagnostic Instruments Used Before Preparation
The first instruments used in an inlay procedure are often the simplest. A mouth mirror provides indirect vision and soft-tissue retraction. An explorer may help assess margins and surface irregularities, although tactile examination should be interpreted together with visual findings and appropriate imaging. A periodontal probe can identify periodontal conditions, pocketing, and soft-tissue concerns that may affect isolation or restoration margins. Cotton pliers support the transfer of small items and placement of cotton rolls or accessories.
Magnification and illumination are especially valuable when evaluating cracks, undermined enamel, old restorative margins, and subtle proximal defects. Loupes with coaxial lighting can improve visualization, but they should be selected and adjusted according to the clinician’s working distance and posture. Magnification does not replace diagnosis; it simply helps the operator inspect the field with greater visual control. The clinician should avoid assuming that every line observed under magnification represents a clinically significant crack. Findings must be correlated with symptoms, transillumination, radiographs, and functional testing when indicated.
Radiographic examination may be necessary when the lesion is proximal, when the depth of the restoration is uncertain, or when pulpal and periapical conditions must be considered. The appropriate imaging method depends on the clinical question, patient factors, and local professional standards. The instruments used to position sensors or films are part of the broader diagnostic workflow, even though they are not unique to inlay treatment.
Diagnostic records may also include intraoral photographs, transillumination, caries-detection aids, digital scans, and occlusal photographs. These records can assist with treatment planning and laboratory communication. A preoperative scan or photograph may be especially useful when the restoration must reproduce a complex cusp pattern or when the patient has a distinctive shade and surface texture.
Preparation Instruments and Cavity Geometry
Preparation instruments are central to the success of an inlay. High-speed handpieces are commonly used for efficient enamel and restorative-material reduction, while low-speed handpieces may support controlled refinement, caries removal, and polishing. The clinician should select burs based on the substrate, the desired outline, the restorative material, and the required degree of surface refinement.
Diamond burs are available in numerous shapes and grits. Round, pear-shaped, fissure, tapered, and football-shaped instruments may each serve different stages of preparation or occlusal adjustment. Coarse instruments can remove material efficiently, while finer grits are generally used for refinement and finishing. The exact sequence should follow the clinician’s training, the restorative manufacturer’s guidance, and the principles associated with the chosen material.
Carbide burs may be used for certain restorative materials or finishing applications. Hand excavators can help remove softened dentin in situations where tactile control is important. The operator should avoid using force to compensate for a dull or unsuitable instrument. Excessive pressure can generate heat, reduce control, and increase the risk of unintended removal of sound tissue.
Water cooling is important during rotary preparation when recommended for the handpiece and bur system. Adequate coolant flow assists with heat management and helps clear debris. The dental assistant should verify that the spray reaches the working area and that suction is positioned effectively without obstructing visibility. If the spray pattern is irregular, the equipment should be checked before treatment rather than relying on the operator to work around the problem.
Features to Evaluate in Rotary Instruments
- Bur shape and active length in relation to the planned cavity.
- Grit sequence and compatibility with enamel, dentin, old restorative material, or ceramic.
- Shank type and compatibility with the handpiece.
- Cutting efficiency and consistency over the expected service period.
- Cooling requirements and visibility during use.
- Cleaning, inspection, and replacement procedures.
- Packaging, traceability, and sterilization instructions.
- Resistance to corrosion or degradation under the clinic’s processing conditions.
Inlay preparations generally require a design that allows the restoration to seat along a defined path without creating an undesirable undercut. Internal angles, cusp preservation, proximal access, and the amount of remaining tooth structure must be considered. The instruments cannot make these decisions independently; they provide the physical control needed to execute a biologically and mechanically appropriate plan.
The clinician should also consider the transition between different bur shapes. A preparation that begins with a broad instrument and ends with a narrow one may develop unwanted steps or irregularities if the operator does not maintain a consistent orientation. The use of magnification, stable finger rests, and light intermittent pressure can improve control. Preparation should be periodically inspected rather than completed solely by following a predetermined number of bur strokes.
Isolation Instruments: The Foundation of Adhesive Dentistry
Moisture control is among the most important parts of an inlay procedure, particularly when adhesive resin cement or other moisture-sensitive materials are used. A rubber dam system may include a dam sheet, frame, punch, clamp forceps, clamps, floss ligatures, and stabilizing accessories. Selecting the clamp requires attention to tooth anatomy, retention, soft-tissue conditions, and the position of the preparation.
Rubber dam isolation can improve visibility and help protect the patient from small instruments or restorative materials. It also separates the treatment field from saliva and movement of the tongue or cheeks. However, placement must be gentle and checked carefully. A clamp that impinges on the gingiva or creates excessive pressure may reduce patient comfort and complicate the procedure.
When a rubber dam is not suitable for a particular clinical situation, alternative isolation methods may involve cotton rolls, absorbent pads, retraction cord, dry-angle systems, cheek retractors, and high-volume evacuation. The appropriate method depends on the margin location, patient cooperation, salivary flow, access, and the bonding system. A dental team should not assume that one isolation technique is appropriate for every inlay case.
Retraction instruments and cords should be used with awareness of periodontal tissues. If a preparation margin extends near or below the gingival margin, tissue management becomes more demanding. Hemorrhage and sulcular fluid can compromise visibility and bonding. The clinician should assess whether the margin can be predictably isolated and whether additional periodontal or restorative planning is indicated.
Isolation planning should begin before preparation rather than after contamination has already occurred. The team should ensure that the clamp, dam, frame, suction, retraction accessories, and replacement materials are available. In some cases, a small amount of enameloplasty, preoperative buildup, or temporary tissue management may improve access and reduce complications during the definitive bonding appointment.
Matrix Systems, Wedges, and Proximal Management
Some inlay preparations involve proximal surfaces, and adjacent-tooth protection is essential during preparation. Matrix bands, wedges, and separation rings are commonly associated with direct restorative procedures, but related accessories may also be useful during provisionalization, contour management, or the repair of proximal defects.
Wedges help adapt a matrix to the cervical region and may provide slight separation between teeth. Sectional systems can assist in producing a predictable proximal contour when restorative material is placed directly. The correct system depends on the tooth’s anatomy, contact position, cervical contour, and the clinician’s restorative plan.
During inlay try-in, dental floss becomes a practical verification instrument. Floss should pass through the contact with appropriate resistance without shredding or forcing the restoration into position. If the contact is too tight, adjustment should be controlled and conservative. If the contact is open, the clinician must determine whether the restoration, tooth preparation, or adjacent anatomy is responsible before proceeding.
Adjacent teeth should be protected from accidental rotary contact. A metal matrix, protective strip, or carefully positioned wedge may help during preparation, particularly when access is limited. The choice of protection should not interfere with visibility or create a false impression of the preparation margin. After preparation, the operator should inspect the adjacent tooth for scratches or unintended defects and document any clinically relevant finding.
Impression Instruments and Digital Scanning Equipment
Traditional workflows use impression trays, elastomeric impression materials, mixing pads or automated mixing systems, adhesive, syringes, and retraction materials. The tray must provide adequate coverage and rigidity while allowing the material to capture the preparation and adjacent structures. The impression should be inspected for voids, pulls, tears, incomplete margins, and distortion before it is sent to the laboratory.
Tray selection is more important than it may initially appear. A tray that is too small may compress the impression material or fail to capture important anatomy. A tray that is excessively large may reduce control and increase material waste. Adhesive should be applied and allowed to act according to the impression-material instructions. The impression material should be mixed consistently, and the syringe tip should be placed close enough to the preparation to reduce air entrapment without damaging the soft tissues.
Digital workflows use an intraoral scanner and associated software to record the preparation, opposing arch, and bite relationship. Scanning can support rapid communication with a laboratory and may allow chairside fabrication when the clinic has suitable milling and firing equipment. Nevertheless, a digital scan is only as reliable as the field presented to the scanner. Blood, saliva, retraction failure, reflective surfaces, and incomplete data can reduce the quality of the digital model.
When using an intraoral scanner, the operator should follow the manufacturer’s scanning path and calibration procedure. The scanner tip must be cleaned and disinfected according to validated instructions. Scanning strategy should include the prepared tooth, adjacent contacts, occlusal surfaces, and sufficient surrounding anatomy to support design and verification. The completed scan should be reviewed on the monitor for holes, stitching errors, motion artifacts, and insufficient capture of the preparation margin.
| Workflow | Core Instruments | Key Quality Check |
|---|---|---|
| Conventional impression | Tray, impression material, syringe, retraction accessories | Continuous capture of the preparation margin without distortion |
| Digital scan | Intraoral scanner, calibrated tip, scanning software | Complete, stable data for the preparation, opposing arch, and bite |
| Chairside CAD/CAM | Scanner, design software, milling unit, furnace or crystallization unit | Material-specific design, milling, sintering, and finishing protocol |
Try-In Instruments and Restoration Assessment
Before final bonding, the inlay should be evaluated in the prepared tooth. A restoration instrument, cotton pliers, or a suitable handling accessory can be used to position the inlay without damaging its surface. Excessive pressure should be avoided, especially if the restoration does not seat easily. Resistance may indicate an internal interference, an incorrect path of insertion, a proximal contact issue, debris in the preparation, or a manufacturing discrepancy.
Visual examination under magnification can identify marginal discrepancies, unsupported areas, surface defects, and shade concerns. The clinician may use try-in pastes when indicated by the restorative and cement system. These materials can help assess the visual effect of certain ceramic restorations, but they must be removed thoroughly before final bonding.
Occlusion should be checked after the restoration is seated in the correct position. Articulating paper, shim stock, and digital occlusal analysis systems may be used according to clinical preference. Occlusal marks should be interpreted in relation to the patient’s existing contacts and functional movements rather than adjusted solely according to the darkness or size of a mark.
The fit assessment should include:
- Complete seating without rocking.
- Acceptable marginal continuity.
- Appropriate proximal contact.
- Correct relationship with opposing teeth.
- Absence of visible cracks, chips, or contamination.
- Patient comfort during closure and excursion.
- Appropriate shade and translucency when esthetics are part of the treatment goal.
If the restoration is difficult to remove after try-in, a small amount of water, air, or a suitable instrument may help, depending on the situation. The operator should avoid levering against fragile enamel or applying force to a thin restoration edge. Restoration handling instruments should have tips that provide control without scratching or contaminating the internal surface.
Bonding and Cementation Accessories
Bonding accessories form a separate but closely connected group of 인레이 기구. These may include microbrushes, disposable applicators, mixing wells, dispensing tips, cement spatulas, curing-light shields, dental floss, isolation aids, and excess-removal instruments. The products should be compatible with the selected adhesive, primer, cement, and restorative material.
Surface treatment varies according to whether the inlay is made from glass ceramic, zirconia, resin-based composite, metal, or another material. Because protocols differ, the dental team should consult the manufacturer’s current instructions for the restoration and bonding system. A protocol suitable for one ceramic may be inappropriate for another material.
A curing light is an important item when the adhesive or cement requires light activation. The light should be checked for output according to the practice’s quality-control system, and the tip should be positioned as close and perpendicular to the restoration as the clinical situation permits. The operator should consider the restoration’s thickness, opacity, shade, and the curing characteristics of the cement. Light activation does not correct contamination or inadequate seating.
Excess cement should be managed at an appropriate stage of the bonding protocol. Dental floss can help clear interproximal excess, while scalers or dedicated removal instruments may be used cautiously at accessible margins. The restoration must remain stable during cleanup. Uncontrolled movement can create marginal defects or alter the final position.
Mixing accessories should be selected according to the cement’s working time and delivery system. Hand-mixed materials may require a clean mixing pad and spatula, while automix systems require compatible dispensing tips. The assistant should verify the material’s expiration date, storage conditions, working time, and curing requirements before it is dispensed. Delayed seating can cause a material to become too viscous, while excessive manipulation can introduce air or reduce the predictability of the bond.
Finishing, Polishing, and Occlusal Adjustment Instruments
Finishing and polishing instruments depend heavily on the restorative material. Fine-grit diamonds, abrasive discs, interproximal strips, rubber polishers, diamond-impregnated polishers, and specialized ceramic systems are common examples. The aim is not simply to make the restoration appear smooth. A properly finished surface should support patient comfort, reduce plaque-retentive irregularities, preserve anatomy, and maintain an appropriate occlusal relationship.
For ceramic inlays, adjustment should be controlled to reduce the chance of chipping or creating rough areas. The sequence often moves from adjustment to refinement and then polishing, with the exact steps determined by the ceramic manufacturer. Resin-based materials may require a different abrasive sequence. Metal restorations require instruments designed for metal adjustment and polishing.
Interproximal finishing strips can be useful when excess material remains between teeth, but they should be used carefully to avoid opening the contact unnecessarily. A final floss check helps confirm that the contact remains clinically acceptable. If polishing is performed near the gingival margin, soft-tissue protection and adequate visibility are necessary.
The clinician should recheck occlusion after polishing. A restoration that initially appears acceptable may develop a premature contact after a small adjustment or after removal of cement. The patient should also be asked about the sensation of biting and chewing before discharge. When an occlusal adjustment is extensive, the restoration should be reassessed under magnification to ensure that the surface is not left rough or structurally compromised.
Instrument Selection by Clinical Setting
General Dental Practice
A general practice may benefit from a versatile inlay tray that supports both conventional and digital cases. The core setup can include diagnostic instruments, a selection of preparation burs, rubber dam accessories, impression or scanning equipment, adhesive applicators, a curing light, articulating materials, and material-specific polishers. A modular system is often more practical than purchasing a large number of specialized instruments that are rarely used.
Prosthodontic or Restorative Referral Practice
A practice focused on indirect restorations may require expanded options for different ceramics, resin-based materials, provisional restorations, occlusal analysis, magnification, and laboratory communication. The team may also maintain dedicated trays for preparation, try-in, bonding, and finishing to reduce setup confusion.
Dental Education and Training Clinics
Teaching clinics should emphasize instrument identification, safe handling, sequence, maintenance, and clinical reasoning. Students should understand why a particular bur shape, isolation device, or polishing system is selected rather than memorizing a single universal kit. Faculty supervision is important when students perform preparation, bonding, or adjustment procedures.
Digital Chairside Workflows
Chairside CAD/CAM practices need equipment beyond hand instruments. The workflow may include a scanner, design software, milling unit, sintering or crystallization equipment, finishing tools, and quality-control procedures. Staff training, maintenance scheduling, material storage, and software updates become part of instrument management.
Mobile or Community Dental Services
Mobile settings may require compact, durable, and easily processed instrument systems. The team must consider access to water, suction, electrical supply, sterilization facilities, and secure storage. In such environments, a carefully prioritized kit is usually more practical than a broad selection of rarely used instruments. Disposable components may simplify logistics, but they still require responsible disposal and compliance with local regulations.
How to Build an Inlay Instrument Tray
A staged tray system can improve efficiency and reduce the chance of overlooking a critical item. The following sequence is a practical organizational model rather than a substitute for a clinic’s approved protocol.
- Place diagnostic instruments first. Include the mirror, explorer, periodontal probe, cotton pliers, and any required imaging or magnification accessories.
- Prepare the isolation group. Select the dam, frame, punch, clamp forceps, clamps, floss, saliva control, and retraction accessories.
- Arrange preparation instruments. Organize burs by sequence and verify handpiece compatibility, coolant delivery, and sharpness.
- Add protective and access components. Include matrix accessories, wedges, retraction cord, protective barriers, and suction tips when indicated.
- Prepare impression or scanning equipment. Check the scanner, tip, software connection, tray, impression material, or other recording materials.
- Set up try-in materials. Place floss, articulating paper, try-in paste if required, cotton pellets, and suitable restoration-handling instruments.
- Organize the bonding group. Confirm the adhesive, primer, cement, applicators, mixing accessories, curing light, and isolation aids.
- Prepare finishing tools. Select material-specific adjustment burs, abrasive strips, polishers, and occlusal-checking materials.
- Verify documentation. Check lot information, expiry dates, sterilization status, and the manufacturer’s instructions for use.
- Conduct a final procedural check. The dental assistant and clinician should confirm that the tray matches the planned restoration and material.
This staged approach can be adapted to the clinic’s layout. Instruments used early in treatment should be accessible without placing sterile items at unnecessary risk of contamination. The tray should also allow the operator to distinguish sterile instruments from disposable or nonsterile accessories.
Many clinics benefit from color coding or labeled cassettes. For example, one cassette may contain preparation burs, another may contain bonding and removal instruments, and a third may contain finishing and polishing devices. Labels should identify not only the instrument group but also the restorative material for which it is intended. This reduces the risk of using a zirconia adjustment instrument on a glass ceramic restoration or applying an incompatible surface treatment.
Cleaning, Sterilization, and Maintenance
Reusable 인레이 기구 must be processed according to the manufacturer’s instructions and the dental practice’s infection-prevention policy. The Centers for Disease Control and Prevention and other national public-health authorities publish guidance on dental instrument processing, but local regulations and professional standards should also be followed.
Immediately after use, instruments should be handled in a manner that reduces drying of bioburden and protects staff from sharps injuries. Cleaning may involve manual methods, ultrasonic cleaning, or an instrument washer, depending on the item and the practice’s validated process. Instruments should be inspected for corrosion, cracks, dull cutting edges, damaged hinges, and residual debris before packaging.
Rotary burs require special attention. A bur that appears intact may still have reduced cutting performance. Reuse policies should consider the bur type, manufacturer’s instructions, material exposure, cleaning method, and risk of cross-contamination. Single-use items should not be reused when the manufacturer designates them for one-time use.
Handpieces and curing lights also need routine care. Handpieces should be cleaned, lubricated, and sterilized according to their instructions. Curing-light tips should be disinfected using a compatible method and checked for resin buildup or scratches that could affect light transmission. Calibration and output checks should be documented according to the practice’s quality-control plan.
Storage is part of maintenance. Sterile instruments should remain packaged until use, and packages should be checked for tears, moisture, or loss of seal. Instruments should be stored in a clean, dry area with a rotation system that reduces prolonged storage beyond the validated period. A damaged package should be reprocessed rather than opened for clinical use.
Ergonomics and Operator Control
Instrument design affects clinician posture, hand fatigue, and treatment precision. Lightweight hand instruments with balanced handles can support controlled manipulation. Rotary handpieces should be held with a stable fulcrum, and the assistant should provide effective retraction and evacuation without forcing the operator into an awkward position.
Magnification should be fitted to the clinician rather than selected solely by magnification strength. The working distance, declination angle, lighting, and patient position all influence ergonomic performance. A poorly adjusted system may increase neck and shoulder strain even when visualization is improved.
Instrument organization also has ergonomic consequences. Frequently used items should be placed within the operator’s normal reach. The assistant should know the sequence well enough to transfer instruments without unnecessary searching. This is particularly important during bonding, when delays can increase the risk of contamination or material setting.
Patient positioning should support direct access and stable visualization. The dental chair, operating light, assistant’s position, and suction placement should be coordinated before rotary preparation begins. Ergonomic improvements can reduce fatigue over a full clinical day and may also improve consistency by allowing the clinician to maintain a stable hand position.
Common Errors in Using 인레이 기구
Choosing Instruments by Appearance Alone
A bur may look suitable but still have the wrong grit, shank, length, or cutting geometry. Selection should be based on the preparation plan and material requirements.
Using a Dull Rotary Instrument
Dull burs can encourage excessive pressure and longer contact time. This may reduce tactile control and increase heat generation. Replacement criteria should be clearly defined for the clinical team.
Underestimating Isolation
Bonding failure is not always caused by the adhesive itself. Saliva, blood, sulcular fluid, or movement during seating can compromise the result. Isolation should be planned before the restoration is opened and tried in.
Forcing an Inlay into Position
If an inlay does not seat with controlled finger pressure, forcing it may damage the restoration or tooth. The clinician should remove the restoration, clean the preparation, inspect the internal surface, and identify the source of interference.
Adjusting Occlusion Without a Reference
Removing material based on one articulating mark can lead to unnecessary reduction. Occlusion should be assessed in maximum intercuspation and functional movements, with attention to the patient’s established bite.
Mixing Incompatible Systems
Adhesives, primers, cements, etchants, surface conditioners, and polishing instruments are not automatically interchangeable. Compatibility should be confirmed using current instructions from the relevant manufacturers.
Failing to Inspect the Field Before Bonding
Small particles of temporary cement, polishing debris, saliva, or blood can remain in the preparation or on the restoration. A final inspection and cleaning step should be included before conditioning and cementation.
Ignoring the Restoration’s Internal Surface
The intaglio surface may require specific treatment, and it should be handled only with compatible instruments and materials. Contamination after conditioning can reduce the predictability of the final bond. The team should minimize unnecessary handling and protect the treated surface until seating.
Procurement and Cost Considerations
There is no single standard price for 인레이 기구 because the term covers a wide range of products. A basic diagnostic and preparation setup will have a different cost from a complete digital chairside system. Price is influenced by material, manufacturing quality, brand, regulatory status, reusability, warranty, sterilization requirements, and the number of accessories included.
Procurement teams should compare total ownership cost rather than unit price alone. Relevant questions include:
- How frequently will the instrument be used?
- Can it be sterilized using the clinic’s existing equipment?
- Are replacement parts or compatible consumables available?
- Does the supplier provide instructions and technical support?
- Is the product registered or approved for the intended market?
- Will the instrument work with existing handpieces, scanners, curing lights, or polishing systems?
- What is the expected service life under the clinic’s protocol?
- Can staff receive adequate training before the product is placed into routine use?
For high-value equipment such as intraoral scanners, milling machines, or curing-light systems, the practice should assess training, maintenance, software support, repair arrangements, and workflow integration. A lower initial price may be less attractive if the system requires proprietary accessories or has limited service coverage.
Supplier evaluation should include product documentation, traceability, delivery reliability, warranty terms, and after-sales support. Claims about clinical superiority should be interpreted carefully unless supported by appropriate evidence, regulatory documentation, or peer-reviewed research.
Inventory control can also reduce hidden costs. The practice should monitor how many burs, polishing points, impression materials, applicators, and mixing tips are used per case. Overstocking can lead to expired materials, while understocking can cause treatment delays. A minimum and maximum inventory level for frequently used products can help maintain continuity without unnecessary expenditure.
Evidence-Based Decision Making
Instrument selection should be guided by established restorative principles and the instructions for the specific material and device. Professional organizations, dental schools, regulatory agencies, and peer-reviewed literature can provide useful background. However, evidence about a restoration material does not automatically validate every instrument marketed for use with it.
When reviewing research or supplier information, consider the study design, sample size, follow-up period, tested material, preparation protocol, and clinical relevance. Laboratory performance may not predict the same result in a busy clinical environment. The most defensible approach is to combine evidence, manufacturer instructions, clinician experience, and documented quality-control procedures.
Clinical records should identify the restorative material, bonding or cementation system, relevant lot information when required, and any significant adjustments. Documentation supports continuity of care and helps the practice investigate unexpected outcomes.
Practices may also conduct small internal audits. They can record remakes, debonding events, postoperative sensitivity, frequent contact adjustments, fractured burs, and recurring scanning or impression problems. These data can reveal whether an instrument, material, training issue, or workflow step needs review. Quality improvement should focus on patterns rather than on isolated events.
Step-by-Step Clinical Workflow
The following overview describes how 인레이 기구 are generally integrated into treatment. It is an educational framework and does not replace formal clinical training, supervision, or material-specific instructions.
Step 1: Evaluate the Tooth and Treatment Objective
Examine symptoms, caries activity, remaining tooth structure, cracks, occlusion, periodontal condition, and radiographic findings when indicated. Determine whether an inlay is appropriate or whether another restoration or endodontic assessment is needed.
Step 2: Plan the Preparation and Restoration Material
Decide whether the restoration will be ceramic, composite, metal, or another suitable material. The material affects preparation design, impression or scanning needs, bonding protocol, adjustment tools, and polishing instruments.
Step 3: Establish Isolation
Select a rubber dam or alternative isolation method. Confirm visibility, access, patient comfort, and control of saliva or bleeding before proceeding.
Step 4: Remove Compromised Tissue and Prepare the Cavity
Use appropriate rotary and hand instruments with controlled pressure, adequate cooling, and continuous assessment of tooth structure. Refine the preparation so that the planned restoration can be fabricated and inserted predictably.
Step 5: Record the Preparation
Capture a conventional impression or digital scan. Record the opposing arch and bite relationship when required. Inspect the data before transmission or laboratory fabrication.
Step 6: Protect the Tooth During the Interim Period
If the final restoration is not placed during the same appointment, provide suitable temporary protection according to the clinical situation. Verify that the temporary material does not interfere with the planned path or soft tissues.
Step 7: Try In the Definitive Restoration
Clean the preparation, place the inlay gently, and evaluate seating, margins, contacts, shade where relevant, and occlusion. Do not proceed to bonding until the restoration and preparation are clinically acceptable.
Step 8: Condition the Surfaces
Apply the prescribed surface treatment to the tooth and restoration. The sequence depends on the restorative material and bonding system. Maintain isolation throughout this stage.
Step 9: Seat the Restoration with the Selected Cement or Adhesive
Apply the material according to its instructions, seat the restoration in the correct path, stabilize it, and remove excess at the appropriate time. Use floss and suitable instruments to manage interproximal areas.
Step 10: Cure, Finish, and Verify
Light-cure or allow the material to set as directed. Remove remaining excess, adjust contacts or occlusion conservatively, polish the restoration, and confirm patient comfort. Record relevant treatment details.
Step 11: Provide Postoperative Instructions
The patient should receive instructions appropriate to the cementation material and clinical situation. The team may explain temporary sensitivity, eating precautions when relevant, oral-hygiene measures, and the importance of reporting persistent pain, a high bite, rough margins, or floss that repeatedly catches.
Step 12: Schedule Follow-Up When Indicated
Follow-up allows the clinician to reassess symptoms, occlusion, periodontal response, and patient adaptation. The timing depends on the restoration, the patient’s risk factors, and the practice’s routine recall system.
Conditions and Requirements for a Predictable Inlay Procedure
Several conditions should be satisfied before an inlay is selected or placed:
| Requirement | Why It Matters |
|---|---|
| Restorable tooth structure | The tooth must provide sufficient support for the planned indirect restoration. |
| Assessable margins | Margins should be accessible for preparation, impression or scanning, bonding, and finishing. |
| Moisture control | Reliable isolation is especially important for adhesive cementation. |
| Compatible material protocol | Surface conditioning, cementation, curing, and polishing must match the restoration material. |
| Accurate laboratory or digital communication | The technician or CAD/CAM workflow needs complete preparation and occlusal information. |
| Functional verification | Contacts, margins, occlusion, and patient comfort should be checked before completion. |
| Patient cooperation | Stable opening, tolerance of isolation, and communication during treatment contribute to safety and efficiency. |
| Maintenance capability | The clinic must be able to clean, sterilize, inspect, and replace instruments appropriately. |
Training and Team Communication
Successful use of 인레이 기구 depends on the entire dental team. Dentists need to understand instrument capability and limitations. Dental assistants should know the sequence, prepare the field, monitor materials, and anticipate the next item. Laboratory technicians need accurate information about the preparation, shade, material, occlusal requirements, and any special instructions.
Short procedural briefings can reduce errors. Before treatment, the team can confirm the restoration material, isolation plan, impression or scanning method, cementation system, and finishing requirements. After treatment, a brief review can identify instruments that were missing, unnecessary, damaged, or difficult to use. This information can improve future tray design.
Training should also include emergency preparedness. Rotary instruments, clamps, wedges, burs, and small accessories must be handled in a way that reduces aspiration, ingestion, and soft-tissue injury risks. The practice should maintain an appropriate response protocol and follow applicable occupational-safety requirements.
New staff members should learn the difference between instruments that are sterile, clean but nonsterile, disposable, and intended only for laboratory use. They should also know how to identify damaged packaging, expired materials, and instruments that must be removed from service. Clear role assignment is particularly important during adhesive procedures because one person may be responsible for isolation while another manages cement and curing equipment.
Future Trends in Inlay Instrumentation
Dental inlay workflows are increasingly influenced by digital planning, improved magnification, material-specific tools, and more integrated practice-management systems. Intraoral scanning and chairside manufacturing may shorten communication steps in suitable cases, while advanced ceramics and resin-based materials continue to require refined surface-treatment protocols.
These developments do not make fundamental instruments obsolete. Diagnosis, isolation, preparation control, careful seating, margin inspection, occlusal verification, and infection prevention remain essential. Technology can improve information transfer and consistency, but it cannot compensate for an inaccessible margin, inadequate isolation, or an incorrectly prepared tooth.
Future procurement decisions are likely to focus more on interoperability. Clinics may evaluate whether scanners, design software, milling units, curing lights, and documentation systems can operate together efficiently. Sustainability may also influence choices involving reusable instruments, packaging, repairability, and responsible consumable management, provided that infection-control requirements remain fully satisfied.
Artificial intelligence and automated design tools may assist with margin detection, occlusal analysis, and restoration proposals, but the clinician remains responsible for verifying the data and approving the final result. Automated systems can misinterpret saliva contamination, unclear margins, unusual anatomy, or missing scan areas. Human inspection continues to be necessary at every clinically important checkpoint.
Expert Checklist for Reviewing 인레이 기구
- Define the inlay materials and procedures most commonly used in the practice.
- Separate diagnostic, preparation, isolation, bonding, and finishing instruments into clear groups.
- Confirm compatibility with existing handpieces and equipment.
- Use current manufacturer instructions for cleaning, sterilization, and material handling.
- Inspect burs, clamps, hand instruments, scanners, and curing lights routinely.
- Establish replacement criteria for worn or damaged items.
- Train the full team in the treatment sequence and instrument transfer.
- Evaluate suppliers by documentation, traceability, service, and reliability as well as price.
- Record material, cement, adjustment, and follow-up information in the patient record.
- Review outcomes periodically and revise the tray when recurring difficulties appear.
- Maintain a backup plan for scanner failure, inadequate isolation, or impression distortion.
- Check that all disposable accessories are stored correctly and used before expiration.
- Confirm that curing-light output and handpiece performance are monitored on a regular schedule.
FAQs About 인레이 기구
What does 인레이 기구 mean?
인레이 기구 means instruments and equipment used for dental inlay treatment. The term can include diagnostic tools, preparation burs, isolation devices, impression or scanning systems, bonding accessories, curing equipment, and finishing or polishing instruments.
Is there one standard inlay instrument kit?
No. The required kit varies according to the restoration material, conventional or digital workflow, laboratory arrangement, clinician preference, and local regulations. A basic case and a chairside CAD/CAM case may require substantially different equipment.
Which instruments are essential for preparation?
Preparation generally requires a suitable high-speed or low-speed handpiece, compatible burs, coolant, suction, diagnostic instruments, and isolation equipment. The exact bur sequence depends on the tooth, preparation design, and restorative material.
Are rubber dam instruments necessary for every inlay?
Isolation requirements depend on the case and bonding system. A rubber dam is often useful for moisture control, but the clinician must assess access, margin location, patient factors, and the manufacturer’s protocol before selecting an isolation method.
Can the same burs be used for every inlay material?
No. Burs and polishers should be selected according to the substrate and restorative material. Instruments designed for ceramic, resin-based composite, metal, enamel, and dentin may have different cutting or polishing characteristics.
What should be checked during try-in?
The clinician should assess seating, marginal adaptation, proximal contacts, occlusion, shade when relevant, surface integrity, and patient comfort. If the inlay does not seat predictably, it should not be forced into place.
How does a digital workflow change the instruments needed?
A digital workflow adds an intraoral scanner, scanning accessories, software, and possibly milling and crystallization or sintering equipment. Conventional clinical instruments remain necessary for diagnosis, preparation, isolation, try-in, bonding, and finishing.
What is the most important maintenance issue?
Every reusable instrument should be cleaned, inspected, packaged, sterilized, and stored according to validated practice procedures and manufacturer instructions. Burs, handpieces, curing-light tips, clamps, and hinged instruments deserve particular attention.
How should a clinic compare suppliers?
Compare product compatibility, documentation, regulatory status, sterilization guidance, warranty, technical support, availability of replacement components, delivery reliability, and total ownership cost. Price should be considered alongside performance and service requirements.
Can patients select inlay instruments themselves?
Patients generally do not need to select individual instruments. They can, however, ask the dental team about the restoration material, isolation method, digital or conventional workflow, sterilization procedures, and the steps used to verify fit and occlusion.
Why is the curing light considered part of the inlay instrument system?
The curing light influences the polymerization of light-activated adhesives and resin cements. Its output, positioning, access, and compatibility with the cement can affect the final result. It should therefore be maintained and checked as carefully as other important clinical equipment.
What should happen if the impression or scan is incomplete?
The defect should be corrected before fabrication whenever possible. An incomplete margin, missing proximal anatomy, or inaccurate bite record can produce a restoration that requires excessive adjustment or cannot be used. Repeating the impression or scan is usually more predictable than attempting to compensate later.
Conclusion
인레이 기구 are best understood as a coordinated clinical system rather than a single category of dental tools. The most reliable approach combines accurate diagnosis, controlled preparation, effective isolation, precise impression or scanning, careful try-in, material-compatible bonding, and disciplined finishing. Practices that organize instruments by procedure, maintain them systematically, and train the entire team can improve workflow consistency and support safer restorative care.
For procurement and clinical planning, the central question is not which instrument is most sophisticated. It is whether the selected instrument performs its intended task predictably, integrates with the practice’s workflow, can be maintained appropriately, and supports the requirements of the chosen inlay material. That principle provides a practical foundation for evaluating 인레이 기구 in both conventional and digital restorative dentistry.
A well-designed inlay system also recognizes that equipment quality and clinical technique are closely connected. The best bur cannot compensate for an unclear diagnosis, and the most advanced scanner cannot correct poor tissue management. In the same way, a high-performance polishing kit cannot resolve an inlay that was inaccurately designed or inadequately seated. Success comes from aligning the instruments, materials, operator skills, assistant support, laboratory communication, and quality-control procedures into one consistent process.
When dental practices review their 인레이 기구 in this way, they can make more informed purchasing decisions, reduce avoidable procedural interruptions, improve communication among team members, and provide patients with a more predictable indirect restorative experience.