A Practical Guide to 인레이 기구
This guide explains 인레이 기구, the instruments and supporting equipment used to assess, prepare, design, fabricate, verify, and deliver indirect dental inlays. It distinguishes clinical tools from laboratory and digital systems, outlines selection and maintenance principles, and describes how instrument accuracy, material compatibility, infection control, ergonomics, and workflow design influence predictable restorative treatment. The discussion is based on established dental principles and emphasizes appropriate training, manufacturer instructions, and professional judgment.
What 인레이 기구 Means in Modern Dentistry
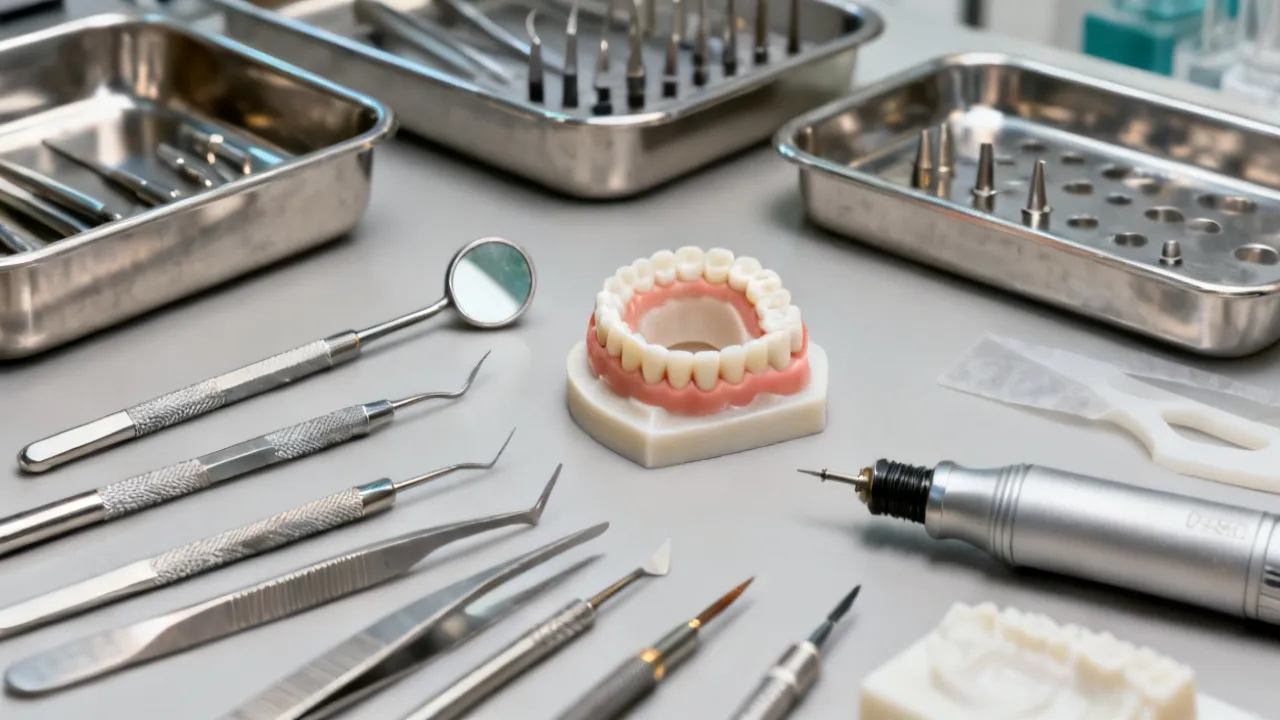
인레이 기구 refers broadly to the instruments, devices, and supporting systems used in the diagnosis, planning, preparation, fabrication, evaluation, placement, and maintenance of dental inlays. The Korean term is commonly associated with tools used for indirect restorations, particularly restorations made outside the mouth and later bonded or cemented into a prepared tooth. Depending on the clinical setting, the term may describe hand instruments used by a dentist, rotary instruments used to shape tooth structure, laboratory tools used by a technician, or digital equipment used to design and manufacture the restoration.
An inlay is an indirect restoration that fits within the cusps of a tooth rather than covering them completely. It is generally considered when a tooth requires more structural replacement than a conventional direct filling can provide, but does not require a full crown or cusp-covering restoration. The decision depends on remaining tooth structure, cavity dimensions, occlusion, caries activity, periodontal conditions, material selection, isolation, and the clinician’s restorative plan.
From an industry expert’s perspective, 인레이 기구 should not be evaluated as a single product category. A well-designed inlay workflow is a coordinated system. Diagnostic instruments must support accurate assessment; preparation instruments must create geometry compatible with the selected restorative material; impression or scanning systems must capture the preparation faithfully; laboratory tools must preserve dimensional accuracy; and finishing and bonding instruments must allow controlled delivery. A highly sophisticated device cannot compensate for inadequate diagnosis, poor moisture control, or an unsuitable preparation design.
For this reason, purchasing decisions should begin with the intended clinical procedure rather than with the appearance or number of instruments in a kit. A practice that mainly places ceramic inlays may prioritize fine diamond burs, scanning equipment, ceramic finishing systems, and adhesive cementation accessories. A laboratory producing cast metal or composite inlays may require different carving, investing, casting, polishing, and quality-control equipment. The correct configuration depends on the material, workflow, operator training, and regulatory environment.
Why Instrument Selection Matters
The fit and longevity of an indirect restoration are influenced by several linked stages. These include diagnosis, tooth preparation, tissue management, impression or scanning, provisionalization, laboratory processing, try-in, adjustment, cementation, and follow-up. Each stage introduces the possibility of error. Instruments that are blunt, poorly balanced, incompatible with the material, or difficult to clean can increase variability and reduce workflow efficiency.
Inlay preparation requires controlled removal of diseased or weakened tooth structure while preserving sound tissue where clinically appropriate. It also requires margins that can be identified, recorded, finished, and sealed. Instruments with stable cutting behavior and predictable dimensions help the operator create a preparation that the laboratory or digital design system can interpret correctly.
Instrument design also affects patient comfort and operator performance. Handles that are too narrow may increase hand fatigue. Excessive vibration can reduce tactile control. Poor visibility can cause over-preparation or incomplete removal of unsupported enamel. An instrument should therefore be judged not only by its cutting ability, but also by balance, access, visibility, heat control, durability, and compatibility with sterilization procedures.
There is no universally superior set of 인레이 기구. A tool that performs well for a posterior ceramic inlay may not be appropriate for a metal restoration or a laboratory composite restoration. The most reliable selection process matches each instrument to a defined step and documents the reason for its inclusion.
Main Categories of 인레이 기구
Although manufacturers organize their catalogs differently, inlay instruments can be grouped into several practical categories. These categories overlap because a complete workflow often combines manual, rotary, digital, and laboratory equipment.
| Category | Typical Function | Key Selection Considerations |
|---|---|---|
| Diagnostic instruments | Examine caries, cracks, margins, contacts, and occlusion. | Visibility, tactile sensitivity, handle ergonomics, and sterilization compatibility. |
| Isolation and access instruments | Maintain a clean field and improve access to the operative site. | Retraction, moisture management, patient comfort, and compatibility with the planned procedure. |
| Rotary preparation instruments | Remove tooth structure and shape internal walls, floors, and margins. | Burr geometry, grit, diameter, concentricity, heat generation, and handpiece compatibility. |
| Manual finishing instruments | Refine margins, remove unsupported material, and check surfaces. | Sharpness, working-end design, access, control, and resistance to corrosion. |
| Impression and scanning equipment | Record the prepared tooth and surrounding anatomy. | Accuracy, software compatibility, field control, and data-management procedures. |
| Laboratory instruments | Shape, press, mill, layer, finish, and polish the indirect restoration. | Material compatibility, repeatability, dust control, and maintenance requirements. |
| Try-in and cementation instruments | Evaluate fit, contacts, occlusion, seating, and cement removal. | Visibility, access, material safety, isolation, and controlled handling. |
| Finishing and polishing systems | Refine restoration surfaces and produce the intended final texture. | Sequence, abrasive compatibility, heat management, and surface requirements. |
Diagnostic Instruments Used Before Preparation
Inlay treatment begins before any cutting instrument touches the tooth. A diagnostic set commonly includes a mouth mirror, explorer, periodontal probe, cotton pliers, articulating materials, photographic equipment, and radiographic or digital imaging systems where clinically indicated. These devices help the clinician assess the extent of disease, the condition of existing restorations, proximal contacts, occlusal relationships, and the availability of sound tooth structure.
A sharp explorer should be used thoughtfully. Tactile information can assist assessment, but excessive force may damage weakened enamel or create misleading findings. Visual inspection under adequate illumination and magnification is often essential when evaluating cracks, marginal staining, and early defects. Transillumination and radiographic evaluation may provide additional information, although every diagnostic method has limitations and should be interpreted in context.
Magnification systems, such as dental loupes or an operating microscope, are not cutting instruments, but they can significantly influence the use of 인레이 기구. Better visualization may improve margin identification and help distinguish residual caries from sound tooth structure. Magnification also makes it easier to inspect the prepared surface before scanning, impression-taking, or provisionalization.
Occlusal analysis is another important diagnostic stage. Articulating paper, digital occlusal analysis systems, and study models may assist in identifying heavy contacts or functional pathways. These tools do not replace clinical judgment. Markings must be interpreted in relation to tooth anatomy, mandibular movement, patient symptoms, and the planned restorative material.
Preoperative photographs can be valuable for documentation and communication. A photograph of the tooth before treatment may record existing anatomy, shade, wear facets, and the relationship with adjacent teeth. In complex cases, photographs also help the laboratory understand the patient’s natural morphology and the clinician’s intended outcome.
Isolation and Operative Access
Moisture control is central to predictable restorative dentistry, especially when adhesive procedures are planned. Isolation instruments may include rubber dam components, clamps, frames, dental floss, wedges, retraction devices, saliva evacuation equipment, and absorbent materials. Their purpose is to provide access, reduce contamination, protect soft tissues, and improve visibility.
The choice of isolation method depends on the tooth’s position, margin location, patient factors, tissue condition, and restorative protocol. A rubber dam may be useful when adhesive contamination must be minimized, but it must be selected and placed correctly. Retraction cords, paste systems, matrices, wedges, and suction devices may support soft-tissue management when a margin is close to the gingiva.
Instruments that create excellent preparation geometry are of limited value if the operative field cannot be kept clean and visible. An expert workflow therefore treats isolation as part of the instrument plan rather than as an afterthought. Before beginning, the dental team should confirm that clamps, wedges, matrix systems, suction tips, protective barriers, and replacement components are available and compatible with the case.
Access should also be considered from the perspective of the assistant and the patient. A preparation may be technically possible but difficult to observe if the mirror fogs, the suction tip obstructs the handpiece, or the patient cannot maintain a stable position. Proper chair positioning, retraction, lighting, and four-handed assistance can improve efficiency without requiring more aggressive cutting.
Rotary Instruments for Inlay Preparation
Rotary instruments are among the most recognizable forms of 인레이 기구. They may include high-speed diamonds, carbide burs, low-speed finishing burs, polishing instruments, and specialized systems designed for particular restorative materials. Their function is not simply to enlarge a cavity. They must help create a preparation with adequate clearance, defined margins, appropriate wall form, and smooth transitions.
Diamond burs are commonly selected according to shape and abrasive grade. Round, pear, football, cylinder, tapered, shoulder, chamfer, and flame forms may serve different purposes. Coarse instruments can remove material efficiently, while finer grits may refine surfaces and margins. The exact sequence depends on the operator’s technique, tooth anatomy, restorative material, and manufacturer recommendations.
Carbide burs may be used for specific cutting or finishing tasks. They can provide a different tactile response from diamond instruments and may be selected for removing existing restorative material or refining particular surfaces. However, instrument choice should be guided by the material being removed and the risk of damaging surrounding tooth structure.
Burr dimensions are important. The diameter and taper influence wall form, internal angles, clearance, and the ability of the restoration to seat. Excessively narrow instruments may produce sharp internal features or difficult-to-clean grooves if used incorrectly. Instruments that are too large may remove unnecessary tooth structure. The operator must balance access and conservation with the requirements of the selected inlay material.
Heat generation is another consideration. Excessive pressure, inadequate water spray, worn abrasive surfaces, or a malfunctioning handpiece can increase heat and reduce cutting efficiency. Water cooling, appropriate speed, intermittent contact, and light pressure are commonly used principles, but the specific procedure must follow the handpiece and instrument manufacturer’s instructions.
Concentricity and runout should not be overlooked. A rotary instrument that does not rotate smoothly may produce vibration, irregular cutting, or operator discomfort. Before use, the dental team should inspect the shank, head, and connection. Any instrument with visible damage, unusual vibration, corrosion, or reduced performance should be removed from service according to the clinic’s policy.
Different grit levels should be used purposefully. A coarse instrument is generally intended for efficient reduction, whereas a fine or extra-fine instrument may be more suitable for surface refinement. Using a coarse bur for every stage can leave deep irregularities and increase the amount of finishing required. Conversely, beginning with an instrument that cuts too slowly may encourage excessive force and prolong the procedure.
Manual Instruments for Margin Refinement
Manual cutting instruments can support controlled finishing after rotary preparation. Examples may include enamel hatchets, hoes, margin trimmers, chisels, excavators, and specialized hand instruments. These tools are selected according to the preparation design, access, operator preference, and the condition of the tooth structure.
Manual instruments may help remove unsupported enamel or refine accessible margins, but they require a sharp working edge and controlled force. A dull instrument can slip, crush enamel, or encourage excessive pressure. Sharpening protocols should be defined by the practice, and instruments should be inspected under suitable lighting before clinical use.
Hand instruments also provide tactile feedback. An experienced clinician may identify differences in surface texture or resistance that are less apparent through rotary cutting alone. Tactile feedback is valuable, but it should be integrated with visual assessment, imaging, magnification, and a clear restorative plan.
Ergonomics is especially relevant during repetitive procedures. Handles with a comfortable diameter and textured grip may reduce unnecessary finger tension. The instrument should allow a stable pen grasp or another controlled grasp appropriate to the procedure. Working posture, patient positioning, lighting, and assistant support influence how effectively manual instruments can be used.
Manual margin finishing should remain conservative. The purpose is to improve clarity and remove unsupported or irregular enamel, not to create a new preparation design without a clear reason. After any manual adjustment, the operator should inspect the margin again and confirm that the resulting geometry remains compatible with the planned restoration.
Preparation Design and Instrument Geometry
The design of an inlay preparation depends on the restorative material and the clinical situation. Traditional concepts often emphasize adequate material thickness, accessible margins, rounded internal form, and the elimination of unsupported enamel. Contemporary adhesive dentistry may permit more conservative designs in selected cases, but the restoration still requires sufficient strength and a geometry that can be accurately milled, pressed, layered, or formed.
Sharp internal line angles can concentrate stress and may be difficult to reproduce during laboratory or digital fabrication. Rounded transitions are often preferred when compatible with the selected material and preparation philosophy. However, “rounding” should not be interpreted as uncontrolled removal of tooth structure. The goal is a deliberate, smooth, and inspectable form.
Occlusal clearance must be evaluated in static and functional positions. A preparation that appears adequate when the teeth are closed may not provide sufficient space during excursions. Clearance gauges, silicone indexes, articulating paper, digital measurement tools, or visual assessment with magnification may assist the process.
Proximal boxes require particular attention. The instrument must provide access without unnecessarily damaging adjacent teeth. Protective matrices, wedges, thin separators, and appropriately shaped burs may help. The clinician should verify the cervical margin, axial walls, contact relationship, and the presence of unsupported enamel before impression-taking or scanning.
Inlay instruments should therefore be chosen as a coordinated sequence. A practical sequence might include an initial access instrument, a preparation-forming instrument, a finer finishing instrument, a manual margin tool, and a verification device. The exact sequence is not universal and should be adapted to the case and material manufacturer’s instructions.
Preparation geometry also affects the laboratory’s ability to control emergence profile and proximal anatomy. A margin that is visible in the mouth but poorly defined in a scan or impression can create uncertainty during design. Clear, smooth, and accessible margins reduce the need for aggressive adjustment at the delivery appointment.
Impression Materials and Digital Scanning Equipment
Once preparation is complete, the restoration must be recorded accurately. Conventional impressions may use trays, elastomeric impression materials, mixing accessories, gingival retraction components, and disinfection systems. Digital workflows may use an intraoral scanner, scan tips, software, a computer, and a validated data-transfer process.
Neither conventional nor digital recording is automatically superior in every circumstance. The clinical result depends on preparation visibility, moisture control, tissue management, operator experience, software settings, material handling, and quality assurance. A digital scanner may struggle with blood, saliva, reflective surfaces, deep margins, or insufficient scan coverage. A conventional impression may be compromised by voids, tray movement, inadequate retraction, or delayed pouring.
For digital workflows, scanner calibration and software updates should follow the manufacturer’s instructions. The team should establish a scanning sequence that captures the preparation, adjacent teeth, opposing arch, and occlusal relationship. The preparation should be inspected on screen for missing data, stitching errors, unclear margins, and distortion before the patient leaves.
For conventional workflows, impression materials should be stored and mixed according to their instructions. Tray selection, adhesive application, working time, setting time, and disinfection procedures all influence accuracy. The impression should be examined under suitable lighting, and defects around the preparation or margin should be evaluated before it is accepted.
Digital and conventional systems also require different forms of documentation. Digital files should be stored securely, labeled consistently, and linked to the correct patient record. Physical impressions and casts should be protected from contamination, distortion, and accidental mix-up. In both workflows, traceability is part of quality management.
When a digital scan is incomplete, rescanning only a small area may not always solve the problem. If the software has already accumulated stitching errors, a new scan segment may inherit or exaggerate distortion. The operator should follow the scanner’s recommended rescanning method and review the complete virtual model before transmission.
Laboratory 인레이 기구
Dental laboratories may use a broad range of 인레이 기구, depending on whether the restoration is made from ceramic, composite, metal, or another indicated material. Common equipment can include model trimmers, articulators, scanners, design software, milling units, furnaces, presses, investment systems, rotary handpieces, diamond discs, polishing wheels, sandblasting units, and dust extraction systems.
For ceramic inlays, technicians may use digital milling systems, crystallization or firing furnaces, ceramic adjustment burs, stain and glaze tools, and polishing systems. Each ceramic family has its own processing requirements. The instrument sequence must be compatible with the material’s hardness, fracture behavior, firing schedule, surface-treatment protocol, and manufacturer guidance.
Composite or hybrid restorative materials may require different burs and polishing systems. Excessive heat or aggressive adjustment can alter the surface or create defects. Metal inlays involve a separate workflow that may include waxing or digital pattern design, investment, casting or milling, finishing, and polishing. The laboratory must maintain equipment suitable for the selected alloy and comply with applicable safety and handling requirements.
Dust control is an important laboratory consideration. Rotary adjustment, milling, sandblasting, and polishing can generate particulate matter. Local extraction, suitable personal protective equipment, cleaning routines, and equipment maintenance should be part of the laboratory’s occupational safety program. The appropriate controls depend on the materials and processes being used.
Articulators and occlusal records support the evaluation of contact relationships. They do not perfectly reproduce every aspect of a patient’s movement, but they can provide useful information when mounted and adjusted properly. The accuracy of the articulator record depends on the impression or scan, bite registration, mounting technique, and the technician’s interpretation.
Laboratory communication should include more than a prescription stating “inlay.” The technician may need information about the selected material, shade, margin location, occlusal concerns, contact preferences, stump shade, provisional condition, and whether the restoration is intended for adhesive bonding or conventional cementation. Complete information allows the laboratory to select appropriate 인레이 기구 and processing parameters.
Try-In Instruments and Clinical Verification
Before definitive bonding or cementation, the inlay should be evaluated carefully. Try-in instruments may include tweezers, mirror and explorer combinations, floss, articulating paper, fit-checking materials, magnification, curing-light guides where relevant, and cleaning accessories. The restoration should be handled gently to reduce the risk of chipping, contamination, or accidental dropping.
Verification normally includes seating, marginal adaptation, proximal contacts, occlusion, contour, shade where relevant, and patient comfort. A restoration that does not seat fully should not be forced. The clinician should identify whether the problem arises from an internal interference, a proximal contact, a preparation discrepancy, contamination, or a dimensional issue in the restoration.
Proximal contacts can be assessed with dental floss and appropriate tactile methods. Contact should permit cleaning while preventing food impaction and maintaining functional stability. Occlusal evaluation should consider the patient’s normal intercuspation and excursive movements rather than relying on a single mark from articulating paper.
Try-in materials and contamination control require attention. Some products may affect bonding if residues are not removed properly. The clinical team should use the selected cementation system’s instructions for cleaning, conditioning, priming, silane application, adhesive application, and isolation. Incompatible combinations of cleaners, primers, silanes, adhesives, and cements may reduce performance or create procedural confusion.
Try-in should also be treated as a decision point rather than a routine formality. If the margin is unclear, the restoration rocks, the contact is excessively tight, or the occlusion requires substantial correction, the cause should be investigated before cementation. It is usually easier and safer to correct a problem while the restoration is unbonded than after definitive placement.
Cementation and Finishing Instruments
Cementation requires a controlled sequence. Typical accessories can include mixing tips, dispensing syringes, microbrushes, applicators, dental floss, scalers, finishing strips, curing-light guides, matrix materials, and polishing instruments. The exact selection depends on whether the restoration is bonded with a resin cement, luted with another cement system, or handled under a different manufacturer protocol.
Before cementation, the tooth and restoration should be prepared according to the selected system. This may involve cleaning, etching, priming, silane application, adhesive application, or another surface-treatment method. These steps are material-specific. A protocol designed for one type of ceramic may not be appropriate for another ceramic, composite, or metal restoration.
Excess cement should be controlled before final polymerization when the selected system permits it. Dental floss can assist in proximal areas, while scalers or suitable finishing instruments may be used after the material reaches the appropriate stage. Excess removal should avoid damaging the restoration margin or traumatizing the gingiva.
A curing light should be evaluated for output and maintained according to the manufacturer’s recommendations. Light intensity can change over time because of contamination, battery condition, aging components, or damage to the light guide. The clinical team should establish a verification schedule and document maintenance where required by the practice’s quality system.
Final finishing may involve fine diamonds, abrasive discs, rubber polishers, ceramic polishing systems, or material-specific instruments. The objective is a smooth, anatomically appropriate surface that supports comfort, function, and hygiene. Over-polishing or indiscriminate reshaping can alter occlusion and proximal anatomy, so adjustments should be conservative and rechecked after each meaningful change.
When adjusting a ceramic inlay, the operator should avoid creating abrupt transitions or deep grooves. The selected polishing sequence should be sufficient to remove scratches created during adjustment. A rough surface may increase plaque retention or create an uncomfortable sensation for the patient. The final surface should be examined visually and, where appropriate, with tactile inspection.
Cleaning, Sterilization, and Infection Control
Reusable 인레이 기구 must be processed through a validated infection-control workflow. The general stages include point-of-use handling, safe transport, cleaning, inspection, packaging where applicable, sterilization, storage, and documentation. The precise process depends on the instrument design, the manufacturer’s instructions, and the healthcare facility’s policies.
Instruments should not be left with visible debris for extended periods if this makes cleaning more difficult. Sharp instruments require puncture-resistant handling and clear separation from delicate items. Automated cleaning may be appropriate for certain instruments, while others require manual cleaning under controlled conditions. Brushes and cleaning solutions should be compatible with the instrument material.
Rotary burs deserve particular attention. Their flutes and abrasive surfaces can retain debris, and some burs are intended for single use or limited reuse. Reuse decisions must follow manufacturer guidance and local infection-control requirements. A bur that appears visually intact may still have reduced cutting efficiency or compromised cleaning performance.
After cleaning, instruments should be inspected for corrosion, cracks, bent shafts, missing components, dull edges, and damaged working surfaces. Packaging should protect the instrument during sterilization and storage. Sterilization equipment should be monitored and maintained under the facility’s applicable standards.
Single-use components should not be reused unless the product is specifically labeled and approved for that purpose under the relevant regulations. Infection-control policies should be communicated to every team member involved in the procedure, including assistants and laboratory personnel when instruments cross between clinical and laboratory environments.
Storage conditions also influence instrument readiness. Sterile packs should remain intact, dry, and protected from excessive handling. Instruments that are difficult to identify should be organized in clearly labeled cassettes or containers. Color coding can support faster selection, but it should supplement rather than replace written identification.
Maintenance and Quality Assurance
A maintenance program extends beyond sharpening or replacing a visibly damaged instrument. It should include handpiece care, bur inspection, waterline management, curing-light verification, scanner calibration, furnace maintenance, dust-extraction checks, and inventory control.
Clinical teams can create a simple inspection checklist for each procedure. The checklist may confirm that the appropriate preparation burs are available, the handpiece is functioning, water spray is adequate, isolation accessories are present, the scanner or impression materials are ready, and the finishing system matches the planned restoration.
Instrument rotation can reduce uneven wear. Using the same bur repeatedly until its performance declines may introduce avoidable variation. A defined replacement policy can be based on manufacturer guidance, visible wear, cutting performance, sterilization history, or procedure count. The policy should be practical and consistently applied.
Documentation is particularly useful when a restoration requires unexpected adjustment or remake. Recording the material, preparation system, scanning or impression method, cement, finishing sequence, and relevant instrument batch can help identify workflow patterns. The objective is not to assign blame, but to support process improvement and patient safety.
Quality assurance can include periodic review of remakes, postoperative sensitivity, marginal concerns, debonding, contact problems, and excessive occlusal adjustment. These outcomes may reveal issues in preparation design, instrument wear, laboratory communication, cementation, or patient selection. A practice that reviews these patterns can make targeted changes instead of replacing an entire instrument system without evidence.
How to Choose 인레이 기구 for a Dental Practice
The first step is to map the practice’s actual workflow. List the types of inlays placed, the materials used, the number of operators, the proportion of digital and conventional cases, and the laboratory arrangements. This prevents the purchase of instruments that are technically impressive but rarely used.
The second step is to identify required functions. A basic clinical sequence may need diagnostic tools, isolation accessories, preparation burs, finishing instruments, impression or scanning equipment, provisionalization materials, try-in tools, cementation accessories, and polishing systems. Each function should have a primary instrument and, where continuity is important, a suitable backup.
The third step is to compare compatibility. Check the handpiece connection, recommended operating speed, cooling requirements, sterilization method, software compatibility, consumable availability, and material-specific instructions. Compatibility should be confirmed in writing when the equipment involves multiple manufacturers.
The fourth step is to assess ergonomics and training. Ask whether the handle is comfortable, whether the instrument improves access, whether staff can identify it easily, and whether the cleaning process is practical. A technically suitable tool may still perform poorly if users do not understand its purpose or cannot maintain it correctly.
The fifth step is to evaluate total ownership requirements. Consider recurring burs, polishing points, scanner tips, furnace parts, calibration, servicing, training, storage, and disposal. A lower initial purchase price does not necessarily represent lower long-term cost, while an expensive system is not automatically more productive.
The sixth step is to establish a trial and feedback process. Where permitted, the team may test representative instruments in routine cases and record cutting control, visibility, vibration, cleaning, durability, and operator preference. Feedback should be collected from dentists, assistants, hygienists where relevant, and laboratory partners.
Purchasing should also account for continuity of supply. An instrument that performs well but is frequently unavailable can disrupt treatment scheduling. Practices should identify approved alternatives for essential burs, cementation accessories, and polishing components. However, substitutions should be evaluated for compatibility rather than made solely because the replacement has a similar appearance.
Procurement Questions for Suppliers
When evaluating a supplier, the dental practice should request clear technical information rather than relying solely on promotional claims. Useful questions include:
- Which restorative materials and procedures is the instrument designed for?
- What handpiece, speed, cooling, or pressure requirements apply?
- Is the instrument intended for single use, limited reuse, or repeated processing?
- What cleaning, sterilization, and storage procedures are validated?
- Are replacement parts and compatible consumables consistently available?
- What training and technical support are provided?
- How are warranty claims, repairs, and calibration handled?
- What regulatory documentation applies in the relevant jurisdiction?
- Can the supplier provide an instruction manual and material-compatibility information?
- Does the supplier provide objective performance data or independent testing information?
Suppliers should be assessed for documentation, responsiveness, traceability, and after-sales support. The practice should verify that the product is legally supplied for its intended use and that labeling is understandable to the clinical team. Where a system involves software or patient data, cybersecurity and data-protection procedures should also be considered.
For digital systems, the practice should ask about file formats, export rights, cloud storage, backup procedures, subscription costs, user permissions, and integration with laboratory software. These details may have a greater long-term effect on workflow than the scanner’s advertised scanning speed.
Common Errors in Using Inlay Instruments
One common error is selecting instruments by shape alone. A tapered diamond may look appropriate, but its dimensions, grit, recommended speed, and intended use determine whether it is suitable. Another error is continuing to use a worn bur because it still cuts. Reduced efficiency may encourage greater pressure and longer contact time, which can affect heat control and preparation precision.
Insufficient visibility is another recurring problem. Clinicians may attempt to compensate with smaller instruments or increased pressure when the underlying issue is inadequate retraction, lighting, magnification, or patient positioning. Improving access often produces a better result than changing the cutting tool alone.
Over-preparation can occur when the operator creates additional clearance without confirming the functional requirement. Under-preparation may lead to thin restorative material or premature occlusal contacts. Both problems emphasize the importance of measurement, preparation planning, and repeated verification.
Improper instrument processing can damage working surfaces and shorten service life. Harsh chemicals, unsuitable ultrasonic cycles, incorrect packaging, and poor drying practices may contribute to corrosion or deterioration. Processing instructions should be available where instruments are cleaned and sterilized.
Another error is mixing cementation systems without confirming compatibility. Different materials may require different surface treatments, primers, and curing conditions. The team should use a written protocol for each restorative material and update it when the manufacturer changes the system.
Failure to protect adjacent teeth during proximal preparation is also avoidable. A rotating instrument can inadvertently mark or remove enamel from a neighboring tooth, particularly when visibility is restricted. Protective matrices, wedges, separation techniques, careful angulation, and controlled strokes should be incorporated into the preparation plan.
Clinical Workflow: A Step-by-Step Guide
The following sequence is a general educational framework. It does not replace professional training, clinical examination, applicable regulations, or the instructions supplied with the restorative materials and instruments.
- Confirm the treatment plan. Assess the tooth, remaining structure, caries risk, periodontal condition, occlusion, symptoms, and suitability for an inlay. Explain alternatives, limitations, expected appointments, and maintenance requirements to the patient.
- Prepare the operatory. Arrange diagnostic tools, isolation accessories, handpieces, preparation burs, finishing instruments, impression or scanning equipment, provisional materials, and cementation supplies before treatment begins.
- Establish visibility and isolation. Position the patient, adjust lighting and magnification, manage soft tissue, and confirm that moisture control is adequate for the selected restorative protocol.
- Remove compromised material conservatively. Use suitable rotary or manual 인레이 기구 with controlled pressure and cooling. Preserve sound structure when clinically appropriate while removing unsupported or diseased tissue.
- Shape and refine the preparation. Create a design compatible with the restoration material. Smooth irregularities, avoid unnecessary sharp internal features, verify clearance, and protect adjacent teeth.
- Inspect the preparation. Use mirrors, explorers, magnification, measurement aids, and occlusal checks. Confirm that the margin is visible and that no debris or unsupported enamel remains.
- Record the preparation. Take a conventional impression or complete the digital scan according to the chosen workflow. Review the record before sending it to the laboratory or proceeding with in-house manufacture.
- Protect the tooth temporarily. Place an appropriate provisional restoration when indicated. Check comfort, occlusion, contacts, and cleanability, and provide suitable patient instructions.
- Fabricate and inspect the restoration. The laboratory or digital production team should follow the material’s validated processing instructions. Examine the inlay for defects, margin quality, contacts, anatomy, and surface condition.
- Conduct the try-in. Remove the provisional, clean the preparation, and assess the inlay without forcing it. Verify seating, proximal contact, occlusion, contour, and appearance where relevant.
- Apply the cementation protocol. Treat the tooth and restoration according to the selected system. Maintain isolation, control the cement, and use curing equipment appropriately.
- Remove excess and finish. Clean proximal and accessible areas carefully. Recheck occlusion and polish adjusted surfaces with compatible instruments.
- Document and review. Record the restoration material, cementation system, relevant instructions, and follow-up plan. Evaluate the patient’s comfort and provide home-care guidance.
Conditions and Requirements for Reliable Use
Reliable use of 인레이 기구 requires more than having the instruments in a drawer. The practice should meet several operational conditions:
- Training: Clinicians and assistants should understand the purpose, limits, and handling requirements of each instrument.
- Material knowledge: The team must know whether the restoration is ceramic, composite, metal, or another material and select compatible preparation and finishing tools.
- Isolation: The operative field must be managed according to the clinical and adhesive requirements of the case.
- Equipment maintenance: Handpieces, scanners, curing lights, furnaces, and extraction systems should be maintained according to their instructions.
- Infection control: Reusable instruments must be cleaned, inspected, packaged, sterilized, and stored through an appropriate process.
- Traceability: Product information, batch details, maintenance records, and clinical protocols should be documented when required.
- Quality control: Preparation records, scans, impressions, provisional restorations, and definitive restorations should be checked at defined points.
- Patient suitability: Treatment should consider oral hygiene, caries activity, parafunction, periodontal health, attendance for follow-up, and the ability to maintain the restoration.
Comparing Manual, Rotary, and Digital Workflows
| Workflow Element | Manual or Conventional Approach | Digital or Computer-Assisted Approach |
|---|---|---|
| Preparation assessment | Visual inspection, tactile examination, mirrors, probes, and physical models. | Magnified imaging, digital photographs, scan review, and software-based measurement where available. |
| Recording anatomy | Elastomeric impression and cast fabrication. | Intraoral scanning and digital file transfer. |
| Restoration design | Wax or physical model procedures. | Computer-aided design using digital preparation and occlusal data. |
| Fabrication | Pressing, casting, layering, or manual processing. | Milling, approved pattern production, or computer-controlled fabrication followed by finishing. |
| Primary advantages | Familiar tactile procedures and broad material options. | Digital storage, repeatable data handling, and potential integration with design and manufacturing systems. |
| Key limitations | Risk of impression distortion, casting variation, or model damage. | Dependence on scan quality, software, calibration, compatible equipment, and operator training. |
The comparison does not imply that one approach is suitable for every practice. A hybrid workflow may be effective, with digital scanning combined with conventional finishing or a physical model used for verification. The correct choice should reflect clinical needs, staff capabilities, laboratory relationships, and the patient’s circumstances.
Digital systems may improve communication by allowing the dentist and technician to review the same virtual preparation. They can also make case archives easier to search and permit certain designs to be reproduced. Nevertheless, digital convenience should not lead to reduced clinical inspection. A visually attractive three-dimensional model may still contain missing margin data, incorrect bite registration, or an inaccurate scan segment.
Evidence, Standards, and Professional Sources
Decisions regarding 인레이 기구 should be based on clinical evidence, manufacturer instructions, dental-school education, and applicable infection-control standards. General principles of restorative preparation, adhesive dentistry, dental materials, and instrument processing are discussed in established dental textbooks and peer-reviewed literature.
For infection prevention, dental practices commonly consult guidance from recognized public-health and professional bodies, including the Centers for Disease Control and Prevention, national dental associations, and local health authorities. The relevant requirements vary by jurisdiction, so a practice should use the standards that apply where treatment is delivered.
For product selection, the primary source should be the manufacturer’s current instructions for use, technical data, sterilization limitations, and material compatibility. Independent clinical research and professional guidance can supplement that information, but promotional descriptions should not be treated as clinical evidence by themselves.
When comparing systems, practices should separate verified characteristics from claims that require independent confirmation. Cutting diameter, connection type, recommended speed, sterilization status, and intended material are usually technical specifications. Statements about superior clinical outcomes, extended longevity, or universal compatibility require appropriate supporting evidence and should not be assumed from a product label.
Environmental and Operational Considerations
Dental practices increasingly examine how instrument selection affects waste, energy use, packaging, and staff time. These considerations should be balanced with infection control and patient safety. Reusable instruments may reduce some forms of waste when they can be cleaned and sterilized effectively, while single-use products may be appropriate when validated reprocessing is not possible.
Consumable management is also important. Expired materials, damaged burs, unused cement components, and obsolete digital accessories can increase operating costs and create disposal concerns. A stock rotation system, minimum and maximum inventory levels, and scheduled review of rarely used items can improve control.
Laboratory equipment may require substantial ventilation, water, electricity, or dust extraction. Preventive maintenance can improve operational stability and reduce avoidable downtime. Before acquiring a furnace, milling unit, scanner, or polishing system, the practice or laboratory should confirm that the facility has suitable electrical, ventilation, workspace, and service arrangements.
Packaging reduction should never compromise sterility or product integrity. Practices can evaluate suppliers that offer efficient packaging, consolidated shipments, recyclable materials where appropriate, and durable storage systems. Environmental considerations are most effective when incorporated into purchasing and inventory procedures rather than treated as an isolated initiative.
Training the Dental Team
Training should cover instrument identification, preparation sequence, handpiece handling, cooling, pressure control, isolation, scanning or impression procedures, cementation, finishing, cleaning, sterilization, and incident reporting. New staff should not be expected to infer these procedures from instrument appearance.
Short protocol cards can be useful in the operatory. They may identify the preparation sequence, approved burs, speed range, cooling requirement, cleaning method, and replacement criteria. For complex digital or laboratory equipment, structured training and competency verification are appropriate.
Team communication is particularly important when the dentist, assistant, and laboratory technician share responsibility. The prescription should state the restoration material, shade requirements where applicable, preparation information, scan or impression details, occlusal records, and any relevant clinical limitations. Clear communication reduces the risk of using an unsuitable instrument or processing sequence.
Training should be refreshed when a new material, cement, scanner, furnace, or instrument family is introduced. A brief update can address changes in surface treatment, reprocessing, software, or replacement policy. Periodic observation of routine procedures may reveal small inefficiencies, such as unnecessary bur changes, poor cassette organization, or delayed access to isolation accessories.
Frequently Asked Questions
What does 인레이 기구 mean?
인레이 기구 means inlay instruments or equipment. The term may refer to clinical hand instruments, rotary burs, isolation accessories, impression or scanning systems, laboratory tools, cementation accessories, and finishing equipment used in an inlay workflow.
Are 인레이 기구 used only by dentists?
No. Dentists use diagnostic, preparation, try-in, and cementation instruments, while dental technicians may use laboratory instruments for designing, fabricating, adjusting, and polishing indirect restorations. Dental assistants may prepare, transfer, clean, and process instruments according to their training and legal scope of practice.
Which instruments are essential for an inlay preparation?
The essential set depends on the case and restorative material. In general, the workflow requires diagnostic instruments, isolation accessories, suitable rotary burs, finishing instruments, preparation-verification tools, and equipment for either conventional impressions or digital scanning. A cementation and polishing system is needed for delivery.
Are ceramic and metal inlays prepared with the same burs?
Not necessarily. Preparation principles may overlap, but the required clearance, margin design, finishing sequence, and laboratory processing differ by material. The clinician and technician should follow the instructions for the selected restorative system and use instruments compatible with that material.
How often should inlay burs be replaced?
There is no single replacement interval for every bur. Replacement depends on the manufacturer’s instructions, frequency of use, material being cut, sterilization history, visible wear, vibration, cutting efficiency, and the practice’s quality policy. A worn or damaged bur should be removed from service.
Can all inlay instruments be sterilized?
No. Sterilization suitability varies by product. Some instruments are reusable, some are intended for limited reuse, and others are single-use. The practice must follow the current instructions for use and applicable infection-control requirements.
Does digital scanning eliminate the need for conventional instruments?
No. Digital scanning changes how the preparation is recorded, but diagnostic instruments, isolation tools, preparation burs, manual finishing instruments, try-in accessories, cementation tools, and polishing systems remain relevant. Digital workflows also require scanner maintenance, software management, and data-quality checks.
What should be checked before purchasing a supplier’s instrument kit?
Check intended use, dimensions, handpiece compatibility, operating requirements, material compatibility, reprocessing instructions, regulatory documentation, replacement availability, training, warranty, and service support. The kit should match the practice’s actual restorative procedures rather than simply containing a large number of components.
Why is cooling important when using rotary 인레이 기구?
Cooling can help manage heat generated during rotary cutting. Excessive heat may affect the tooth, the instrument, or the operator’s control. The correct cooling method depends on the handpiece, bur, speed, pressure, and manufacturer instructions.
What is the most important factor in inlay instrument performance?
Performance results from the interaction of instrument quality, correct selection, operator technique, preparation design, isolation, equipment maintenance, and material compatibility. No single instrument can ensure a predictable restoration if the surrounding workflow is poorly controlled.
Final Perspective
인레이 기구 should be understood as an integrated restorative system rather than a collection of isolated tools. The most important priorities are accurate diagnosis, conservative but material-appropriate preparation, dependable moisture control, reliable recording of the preparation, careful verification, compatible cementation, and disciplined instrument processing.
For dental practices, the strongest procurement strategy is to define the workflow first, identify the required functions, verify technical compatibility, train the team, and monitor performance over time. For laboratories, material-specific instruments, calibrated equipment, dust control, and communication with the clinic are central to consistency. For both settings, manufacturer instructions and applicable professional standards should guide use, cleaning, maintenance, and replacement.
When selected and managed systematically, 인레이 기구 can support a more organized and predictable indirect restorative workflow. The goal is not to accumulate more instruments, but to ensure that every instrument has a clear purpose, is used correctly, and contributes to safe, precise, and maintainable patient care.